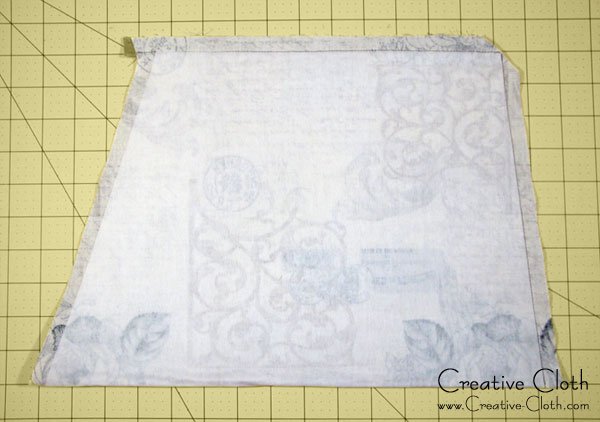
Make the Ruffled Panel
The ruffled panel is not only a decorative panel that is attached to the front of the bag, it also conceals a hidden zipper pocket for carrying items that you need to get to in a hurry such as car keys or cell phone. And because the panel is open at the top, you can also use it as a pocket. It’s not recommended that you put small items in the ruffle pocket because the ruffled bits at the side between the buttons are open, however you could use it for carrying shopping lists or similar items.
Attach the Interfacing
The first step is to iron the interfacing to the ruffled panel. Note that the there is no seam allowance on the interfacing so you need to center it on the fabric. The seam allowance is omitted to help reduce the bulk in the seams, which will make it much easier to sew the panel to the bag body, particularly the gathered edge.
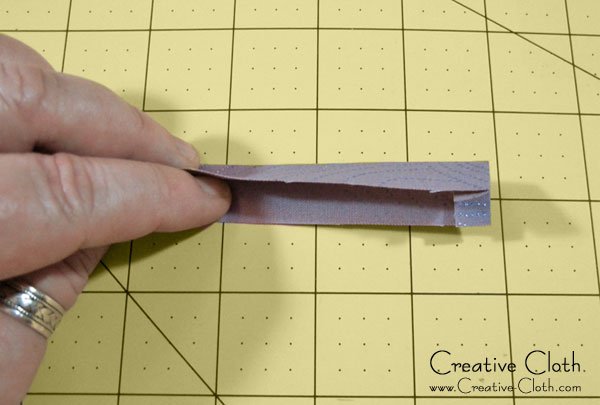
Attach the Faux Piping
Faux piping is quick and easy to make however you could also use traditional piping if you want. To make the faux piping, fold one short end of the fabric under 1/4″ and press. With wrong sides facing, fold lengthwise matching the raw edges and press.
With the right side of the ruffled panel facing up, align the raw edges of the faux piping along the top and position the folded edge 1/2″ in from the right edge. Pin and baste. By positioning the piping 1/2″ in from the end, it won’t get caught in the seam when it’s sewn and the seam will lay flat.
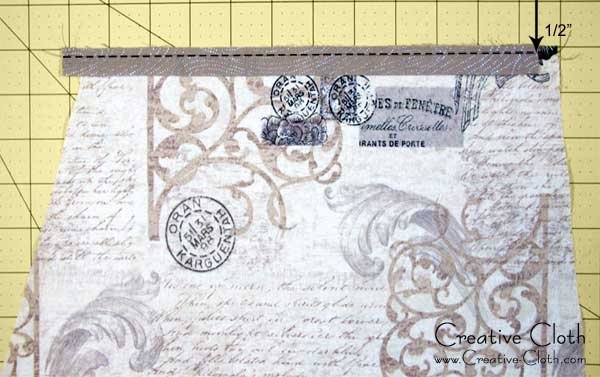
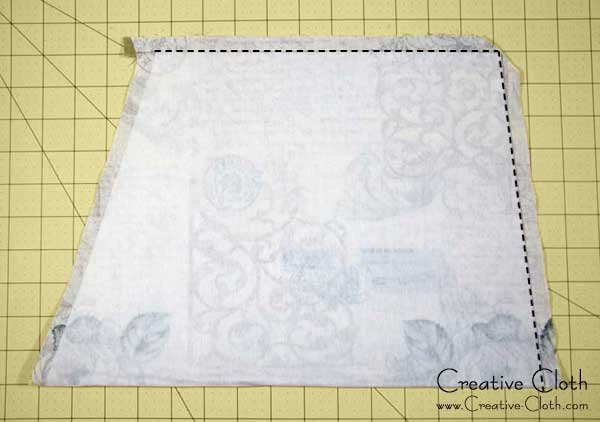
With right sides facing, fold the ruffled panel in half matching the raw edges along the top and sides. Sew 1/2″ seam along top and right side. Leave the left side open. Using small sharp scissors, clip the corners. This helps to reduce bulk in the corner when the panel is turned right side out. Trim 1/4″ from the top seam. This will make it easier to fold and press the top section.
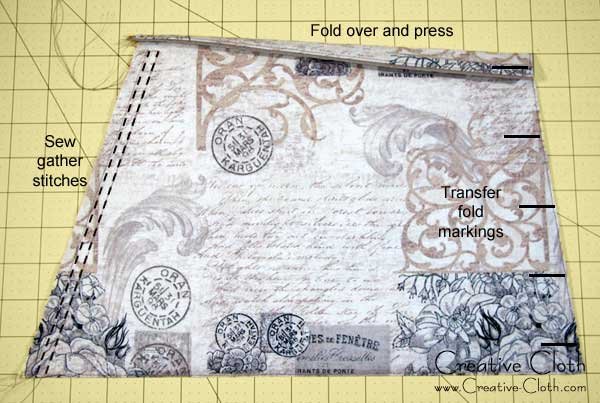
Turn right side out, carefully poke out the corners and press. I use a Dritz point turner to poke out the corners. Topstitch close to the edge along on the top, right side, and bottom. Leave the left side open.

Fold the top section along the fold line and press. Using a fabric marking pen, transfer the “ruffle fold” markings from pattern piece C to the top of the ruffled panel along the right side. Using strong thread, sew two rows of gather stitches along the left side.
To make gather stitches, choose a long stitch length – I use a setting of 5 – and sew two rows parallel to each other. Lock stitch one end of each of the rows. This will make it easier to gather the threads.
Coming up Next
In the next session we’ll make the front zipper pocket and attach the front ruffled panel to the bag body.
The Phoebe SewAlong
1. Welcome
2. Gather Your Supplies
3. Prepare the Pattern and Cut the Pieces
4. Make the Ruffled Panel
5. Make the Bag Body
6. Make the Lining
7. Make the Bag Top
8. Assemble the Bag


