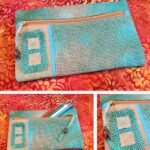
Zipper pockets provide a secure place to store items such as credit cards and money. They can be easily added to any purse pattern and positioned either on the inside or the outside of the purse. They are not difficult to sew and only require a little planning to design.
One of the best things that I like about making zipper pockets, is that you can use a contrasting fabric for the pocket that adds a surprise pop of color when you open it.
Designing a Zipper Pocket for your Bag
If you’re in the process of making a new bag and want to add a zipper pocket, first decide what size pocket you need. Zipper pockets can extend the full width of the bag, or can be made smaller depending on what you intend to store inside. Once you’ve decided on the size, add 2″ to the width and 1-1/2″ to the height, then cut two pieces of fabric. For example, the size of my zipper pocket is 8″ wide by 6″ high and I’ve cut two pieces of fabric 10″ wide by 7-1/2″ high.
Zipper pockets can be added either to the outside of the bag in which case they would be sewn into the exterior fabric either on the front or the back. Or they can be sewn into the lining on the inside of the bag. Always use interfacing to line the main fabric and the pocket as this will provide support so the fabric won’t sag or droop. I like to use fusible interfacing such as Pellon mid-weight fusible interfacing.

Sewing a Zipper Pocket into to your Bag
Sewing a zipper into this type of pocket is the easiest thing you’ll ever do using this method.
Position one of the pocket pieces on a flat surface with wrong side facing up. Measure 1″ down from the top edge of the pocket, and using a fine sharpie or pen, center and draw a straight line the length of your pocket opening. My pocket opening is 8″. You should have an extra 1″ on both sides.
Measure 1-1/2″ down from the top edge and draw a parallel line the same length. Join the line at both ends to form a rectangle. This is the stitching line.

Measure 1-1/4″ down from the top edge and draw a line that is 1/4″ shorter on both ends. Draw a short line from the corner of the stitching line to the center line on all four corners. This is the cutting line.

With right sides of the fabric facing, position the pocket piece on your main fabric – this will be either the lining or the exterior bag fabric. Pin in place.

Sew neatly along the stitching line. The straighter you sew, the better your pocket will look.

Using a small pair of sharp scissors, cut along the cutting line. Snip into the corners as close as you can to the stitches without cutting them.

Turn the pocket to the inside through the opening, and press the seams with an iron.

Now it’s time to attach the zipper. Use a zipper that is several inches or more longer than the pocket opening. This will make things so much easier to sew.

Center and position the zipper on the inside along the opening. You will need to unzip the zipper to position the slider. Pin in place.

Sew the zipper in place stitch close to the edge of the opening. Move the zipper slider as needed, to make it easier to sew.

Tip: For sewing a perfect topstitch, butt the edge of the sewing foot up against the zipper teeth and nudge the needle into position. This will keep the stitches perfectly straight as you sew.

With right sides facing, pin the pocket pieces together.

Sew a 1/4″ seam all the way around. You will need to move the main fabric out of the way as you sew. Trim the zipper ends and you’re done!

One perfect zipper pocket.


