You can see part 1 here.
After finishing the faux batik process, I’m now ready to finish the piece of cloth by adding a stencilled flower design. I chose a flower design that looked kind of batik-like and cut the stencil using using my new Silhouette Cameo. I *love* that I can now design and cut stencils – even large ones like this which is 8″ square – in only a matter of minutes.

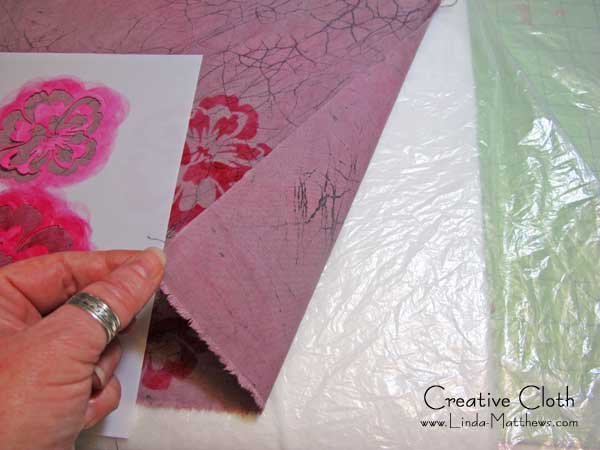
It’s sometimes difficult to transfer sharp stencil design to fabric, however the trick is to use a padded surface. I usually place a piece of quilt batting underneath the fabric, a sheet of plastic on top of the batting to protect it, and then the fabric to be stencilled on top.
For this project I’m using screen printing ink, which is transparent so it won’t cover up the batik crackle. And for large stencils I like to use a large foam pouncer.

When using large stencils I tape the top and left edges to prevent the stencil from shifting.

And then I can fold the right side back to take a peek and make sure the paint is transferring properly.

With these tools and technique, I always get a crisp outline on my stencilled designs.

I like the way this one is turning out. And I like that I actually managed to choose a paint color that matches my coordinating fabric. It doesn’t always work out that way.

Although this project is taking a little longer than I expected, the fabric should be finished shortly and then I can start sewing – yeah!! Because remember when I started out – this is going to be the fabric for my new crazy looking bag. You can see the pattern here. The final installment soon. I hope.


