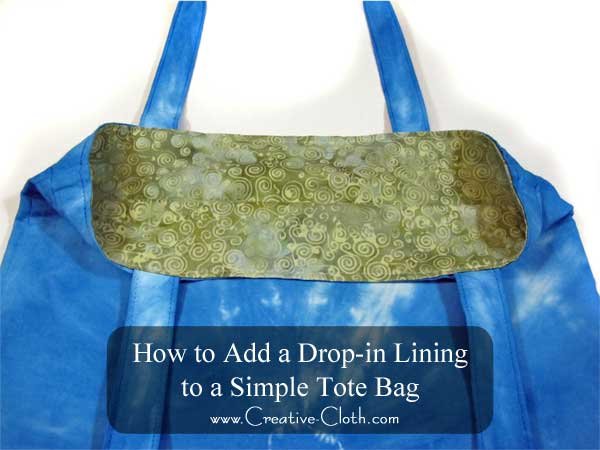
Simple tote bags are quick and easy to make and making them from one layer of fabric is the perfect choice if they’re only going to be used to carry light items. For carrying heavier items, bags need a little more strength and this can be achieved by adding a lining.
As well as making the bag stronger, adding a bag lining to a tote bag gives it a little more structure and shape, and it also improves the wearability.
This tutorial shows you how to make a simple drop-in lining that is quick and easy to make, and can be sewn in about 10 minutes.
Supplies
- Pre-made Bag – If you don’t have a pre-made bag, whip up a Super Simple Thirty Minute Tote Bag
- Lining Fabric
Instructions
You first need to calculate how much fabric you’ll need. Measure the width of the bag along the top …
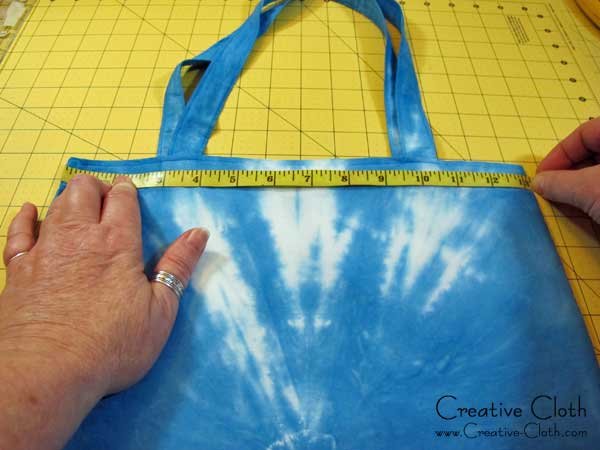
… and the length of the bag along the side seam.
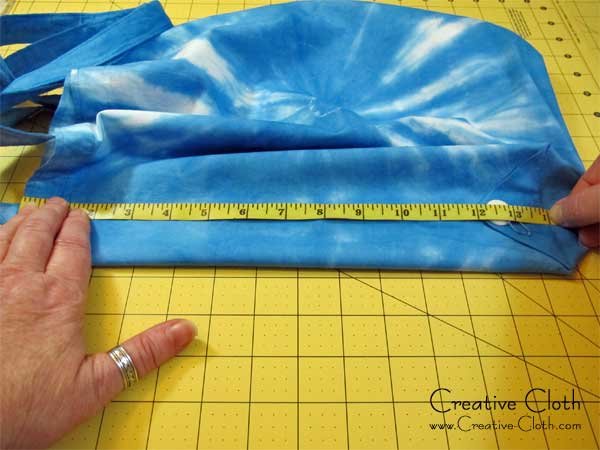
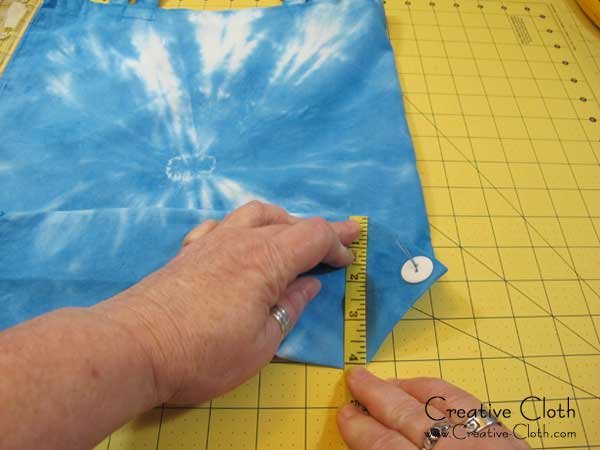
If the bag has boxed corners measure the depth of the boxed corner.
Cut a piece of fabric as follows
For bags without boxed corners – width = width of bag + 1″; length = length of bag x 2 + 1″
For bags with boxed corners – width = width of bag + 1″; length = length of bag x 2 + depth of bag + 1″
For example, my bag measurements are: width = 13″; length = 14″; depth = 4″. So I’m cutting my fabric 14″ by 33″.
Iron the fabric before you begin. With right sides facing, fold the fabric in half lengthways and sew 1/2″ seams down both sides. If your bag has boxed corners, follow this tutorial to make boxed corners.

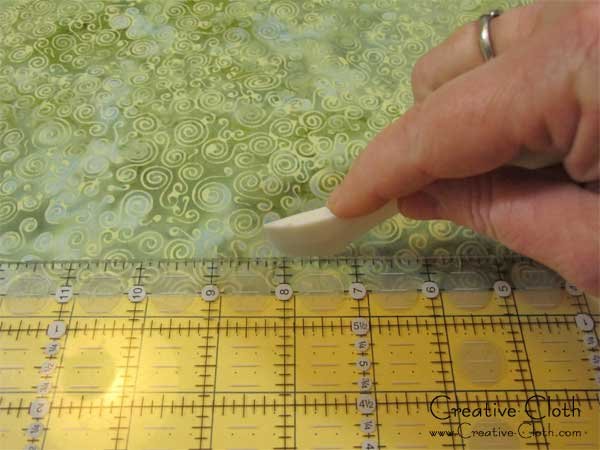
Fold the top edge under 1/2″. The easiest way to make a crease in the fabric so that you can easily fold it is to use a hera marker. See here for more details on how to use a hera marker. Or simply measure and fold the fabric.
Pin the fold along the inside of the lining (right side of the fabric).
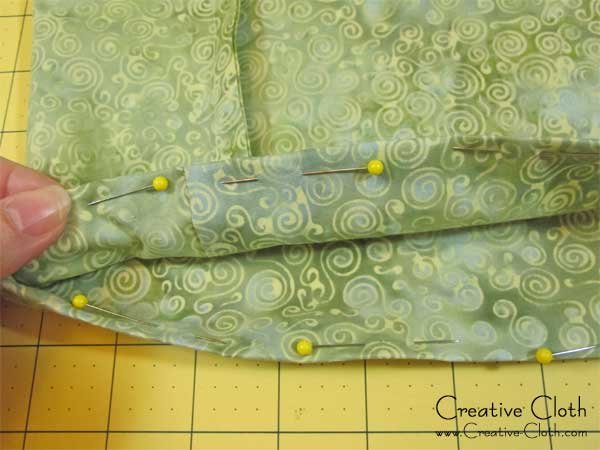
Now slip the lining into the bag to test for fit. If any adjustments need to be made, now’s the time to do it. If everything fits, match the side seams, align the top of the lining and the top of the bag, and pin the lining to the bag on the outside. The more accurate you can be with the alignment, the better your bag will look.
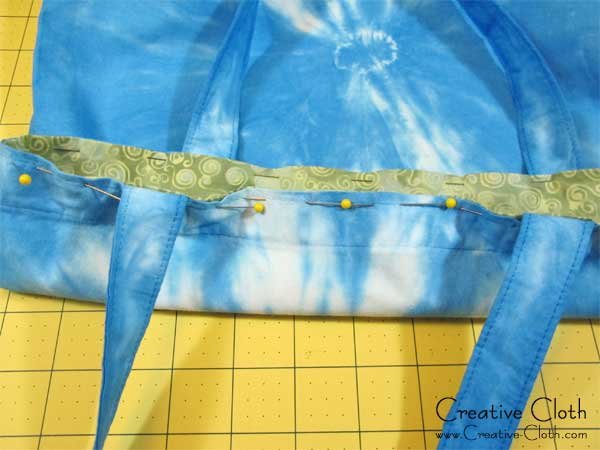
Stitch over the top of the stitching on the bag and your lining is finished! Easy wasn’t it?


