I’ve been using inkjet printers to print my own images and photos onto fabric for over 15 years. Back in the “old days” it was quite the challenge to print images onto fabric and get good results, however thanks to today’s technology it’s has never been easier to get beautiful fabric photos that are perfect for including in all your stitched art and sewing projects.
The creative opportunities for using your own personal photos or your own custom designed fabric are limited only by your imagination. Printed images and fabric can be used in textile and quilt art, wearable art, photo quilts, and mixed media art, and just about any other fabric-related project you can think of. You only have to look around you to discover a world of creative opportunities just waiting to be explored.
I personally love to use fabric images in all my stitched art particularly mixed media journals. Images help to tell a story without the necessity for words.
What you need to get started printing on fabric
Getting started printing on fabric requires only a few supplies.
You need:
- A photo or image
- An inkjet printer
- Fabric that is adhered to a backing paper
Photos and Images
The easiest way to print a photo or image is directly from a photo editing program such as Photoshop or Photoshop Elements.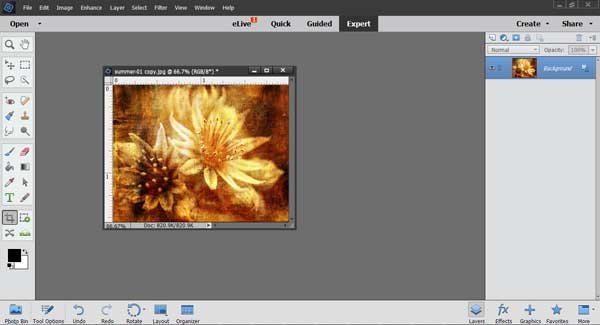
Using a photo editing program allows you to resize and touch up your photos prior to printing because it’s worth remembering – the quality of your inkjet print will be only as good as the quality of the photo or image you are using. You should also use a high resolution image of around 200-300 dpi which will give you a quality print.
Photos can be scanned into your computer or printed directly from the scanner however this gives you less control over the quality of your photo.
I also use Photoshop to create PhotoArt. I use these techniques to enhance my photos and images, and also to improve the quality. As an amateur photographer I don’t always take perfect photos, and manipulating them in Photoshop allows me to create images that perfectly tell my story.
Inkjet Printers
You can print your photos or images using any standard home inkjet printer however I use and recommend Epson printers for printing onto fabric. I use a basic XP-440 printer for small fabric prints up to 8-1/2″ wide, and a P400 professional photo printer for large fabric prints up to 13″ wide.
It’s recommended that you do a test print first to determine the best print settings as some printers will print fine using the “Standard” print setting, but some printers print better using the “Photo” print setting.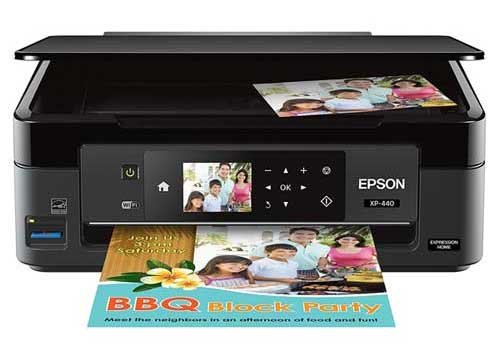
The best type of printer is one that has an L-shaped feed – feeds from the top and spits out at the front, passing through the printer with a gentle curve. This is one of the most common types of printers.
However printers that have a U-shaped feed – one that passes through the printer with a sharp u-turn, are not recommended for printing on fabric as the fabric can possibly come loose from the backing paper and cause paper jams.
Fabric Adhered to a Backing Paper
In order for your fabric to feed through the printer, you need to use fabric that is adhered to a paper backing. This ensures that the fabric will feed through the printer smoothly just like paper.
The easiest way is to use commercial fabric sheets such as EQ Printables, however you could also iron a piece of white fabric to some freezer paper, or use heavy duty freezer paper sheets which help to feed the fabric through will less problems.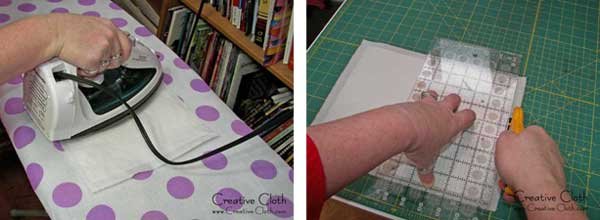
If you want your prints to be water-resistant and/or washable, you need to ensure that your fabric is pre-treated prior to printing. Once your image is printed, it’s too late.
You can pre-treat your fabric yourself to make the prints permanent using Bubble Jet-set, which is a liquid solution that you use to soak your fabric prior to printing. This pre-treatment will make your fabric prints permanent and washable. Once pre-treated, then adhere the fabric to a piece of freezer paper.
Or for a quick and no-fuss method, simply use commercial fabric sheets such as EQ Printables which are already pre-treated and adhered to a paper backing. These fabric sheets are my preferred method for printing standard size prints and will give you a fabulous result every time.
Ready to Print?
When you’re ready to print, simply place the fabric sheet in your printer just like a piece of copy paper and print.
Once your image is printed, allow the ink to dry. If you used Bubble Jet-set to pre-treat the fabric, then rinse the print using a mild detergent such as Bubble Jet Rinse to remove any excess ink, allow to dry flat on a towel, then iron the wrinkles out with an iron. If using commercial fabric sheets, follow the instructions. Your print is now ready to use!


