I work a lot with textured fabric surfaces mostly because I think they look a lot more interesting than flat surfaces. Sometimes I create surface texture using machine stitching.

And I also use a lot of fabric paper texture.

I also sometimes like to use unusual materials such as tyvek to create texture.

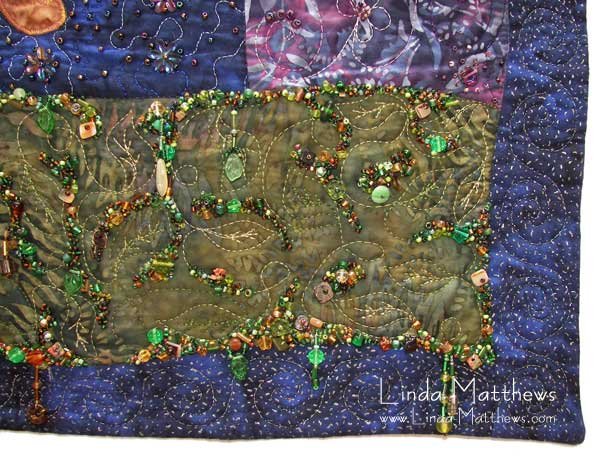
And of course one of my favorite textures – beaded texture.
There are simply endless ways to create texture on fabric!
Another of my favorite ways to create texture is to use ribbons. Ribbons can of course be used in the normal way to make pretty bows and such, but it can also be used creatively – to make ribbon fabric for instance.

And it also can be used to create interesting textured fabric surfaces.
Using ribbon to create a textured surface
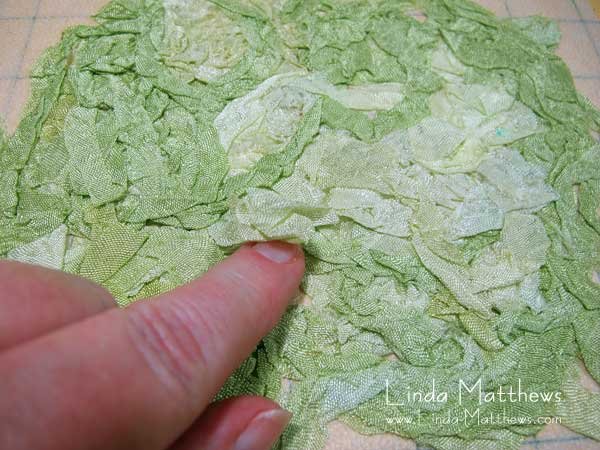
Rayon ribbon is particularly useful for creating textured fabric surfaces. If you’ve every worn a piece of clothing made from rayon fabric, then you’ll know just how easily wrinkled it can become. And it’s this particular feature that makes rayon ribbon so useful for adding texture.
You can buy rayon ribbon either crinkled or flat. To flatten crinkled rayon ribbon, simply iron with a hot iron. To crinkle flat ray ribbon, simply bunch it in your hand, spritz it with a little water and then scrunch tightly. Allow the ribbon to dry thoroughly and the crinkles will become permanent unless you iron them flat.

To use ribbon to make a textured surface you need to use crinkled ribbon. You can use short pieces or leftover pieces of ribbon for this technique. And they don’t all have to be one color. You can combine different shades or even totally different colors.

Using this technique, you can position the crinkled ribbon directly onto a piece of background fabric and sew it in place to create a textured surface. Or you can position the ribbon onto a piece of fusible interfacing and fuse it in place. Fusing it to a piece of interfacing means you can create different pieces of ribbon texture and save them for future use or use them to cut out shapes and applique pieces.
When positioning the ribbon on the background fabric or interfacing, arrange the ribbon out so that it creates a solid surface without too may gaps.

Once the ribbon is arranged, press it with a hot iron. If using fusible interfacing, use a teflon pressing sheet to protect your iron from the fusible. After pressing, some of the ribbon texture will still be loose on top so handle carefully.
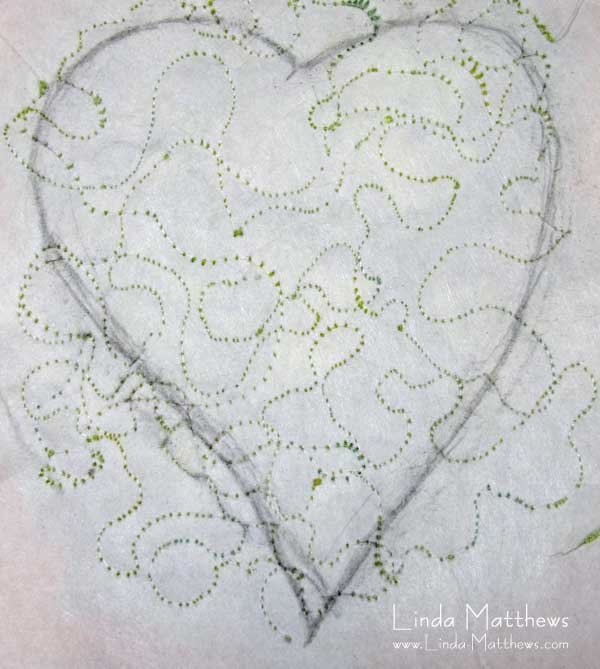
Then you need to sew over the top of the surface using your sewing machine. You can do this using free motion as I’ve done, or standard straight stitch sewing. If your stitching puckers, you may need to use a piece of tear-away stabilizer or iron-on stabilizer to support the cloth, and you only need to sew enough to capture the loose ribbon on top. I’ve used free motion stitching.

Although rayon ribbon and fabric crinkle and wrinkle very easily, it also frays very easily too. So if using the ribbon texture to cut out an applique shape, you first want to sew one or two rows of straight stitch around the edges before you cut out the shape in order to prevent it from fraying too badly. The easiest way to do this is to draw the shape on the interfacing side.
Sew along the outline, then carefully cut out the shape close to the stitching using a pair of small sharp scissors.
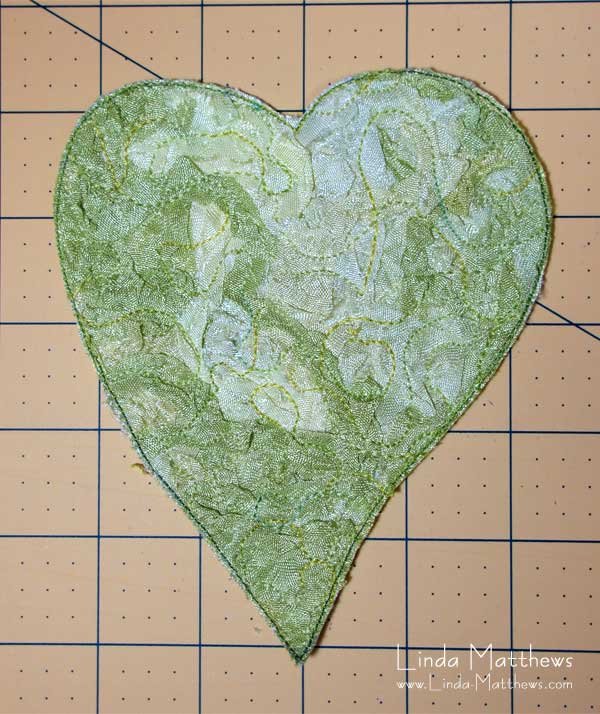
Now the textured ribbon applique is ready to be attached to the background fabric. Not sure yet where I’m going with this, but it sure looks pretty.


