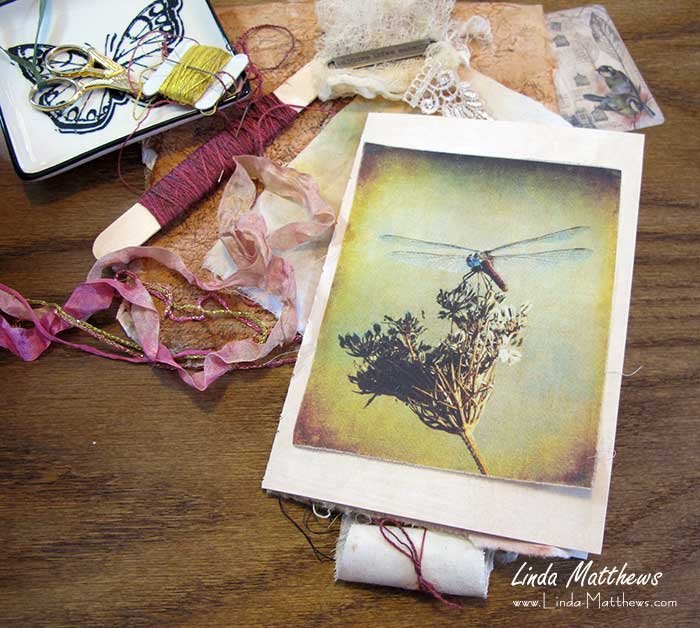
I’m still working on my stitched summer journal. This week was particularly busy so I’ve only managed a few stitches here and there, but I did get the PhotoArt image for the cover designed and printed onto fabric ready for stitching. I really love the way this particular piece of PhotoArt turned out.
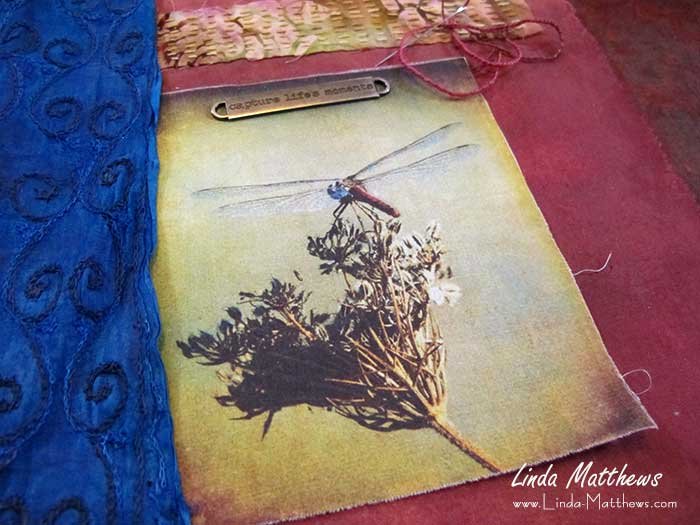
Nothing reminds me of summer more than the dragonfly with it’s lazy way of flitting around from here to there so I chose a photo of a dragonfly to be the cover for this Summer journal. The dragonfly is also a symbol of metamorphosis and transformation, and isn’t that really what the seasons bring us as we move from one to another.
It isn’t difficult to create beautiful PhotoArt using simple techniques so here’s a few quick tips for blending textures with your photos.
PhotoArt Textures: Playing with Blend Modes
I love to stack textures to create rich and blended backgrounds for my PhotoArt, and I often use different blend modes for different layers. Because results can vary greatly depending on the type of photo, the color of the texture, and the type of blend mode that use use, there can be a lot of trial and error to get just the right effect.
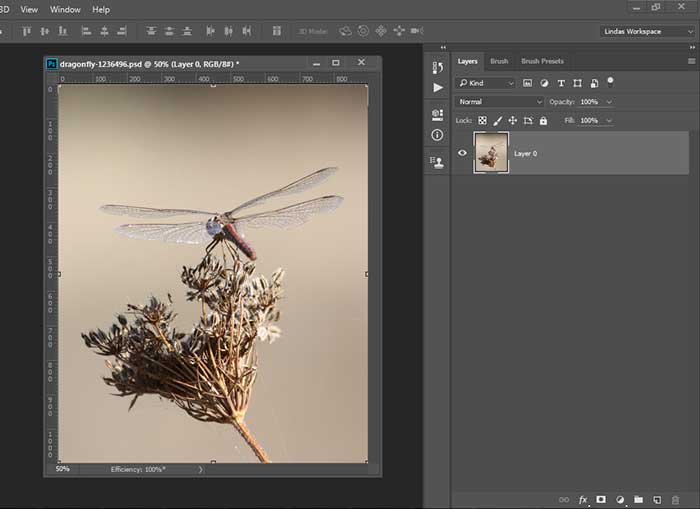
I got this beautiful photo from Pixabay.
I added several textures and set the top two to “Overlay” and “Soft Light” which are two of the blend modes that work particularly well for blending textures. But setting the Dark layer to “Overlay” or “Soft Light” resulted in a very washed out appearance.

Cycling through the blend modes manually can be very time consuming, so thank goodness for keyboard shortcuts! It’s quick and easy to cycle through the blend modes using keyboard shortcuts “Shift +” to cycle forward, and “Shift –” to cycle backward. Cycling through them in this way, you can quickly see which blend modes have possibilities. “Color Burn” added a burnt out effect which could probably look ok with a little work.

Finally I landed on “Subtract” blend mode. I don’t think I’ve every used this blend mode for a texture overlay, but for this particular photo it added a beautiful overall blue hue with a vintage feel which just seemed perfect, so this is the one I chose to use.

With the two top layers turned off, it looks like this which is a little dull and dreary so the top two layers are needed to add brightness and additional golden color.
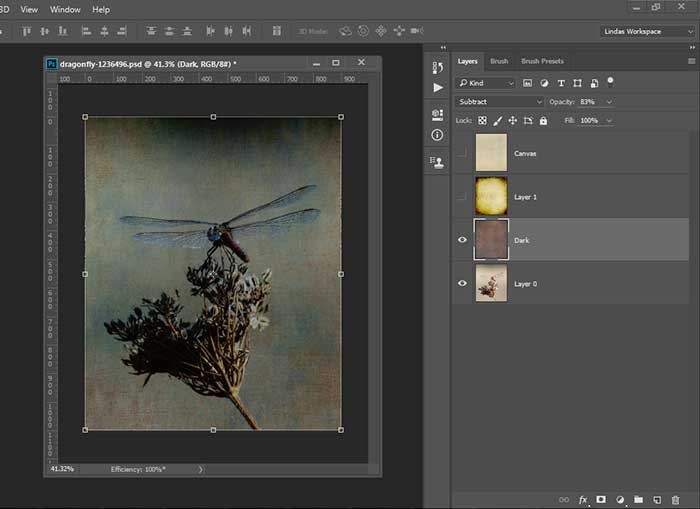
If you want to know the technical aspects of this blend mode, “Subtract” works like this – the colors of the top layer are subtracted from the colors of the bottom layer. In areas where the top layer is black, the new color is the color of the bottom layer.
All that’s a little over my head, I just think it’s magic.


