Have you ever taken a photo where the flash didn’t go off or you were too far away from the object and the photo turned out a little dark or underexposed?
Here’s a super quick fix.
Note: This tutorial is presented using Photoshop however the steps should be similar in Photoshop Elements.
I sometimes end up with dark photos when I take product shots indoors and I haven’t set up the lighting properly, and this fabric box is a good example because the image is very dark and shadowy.
To fix the problem, open your image in Photoshop, highlight the image layer, and from the main menu select “Layer – Duplicate Layer”.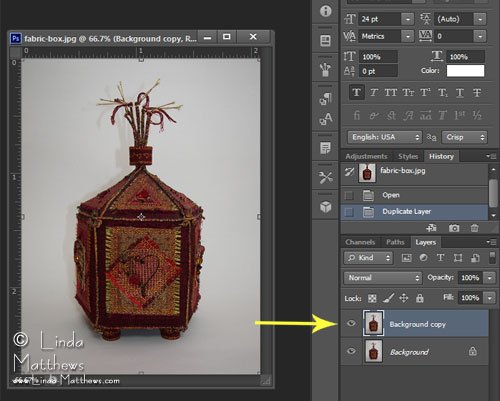
With the top layer highlighted, select “Screen” from the Blending Modes.
And as if by magic, you can see that your image has brightened considerably. If the image is too bright, you can always adjust the opacity of the top layer as needed.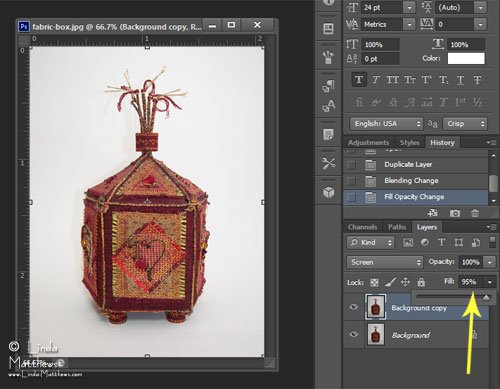
What a difference and it only took a few seconds to fix!


