If you’ve been following along, I’m currently doing a review of all the cool new stuff in the latest version 9 of Photoshop Elements.
In this tutorial I’m going to demonstrate the layer mask tool. In previous versions of Photoshop Elements, in order to use layer masks basically you had to add a new layer, change the settings, and group it with your main image, which was perfectly doable if not a little messy but required a lot more thought processing. But we don’t want to think that much – it hurts! So thank you Adobe for including layers masks in the new version 9! Now, with one click it’s done!
Layer masks can be used in lots of different ways, but basically they allow you to hide or mask certain parts of an image without destroying the image. In other words, you make all your adjustments on the layer mask, leaving the image untouched. It’s called non-destructive editing.
One other thing to note when working with layer masks is that you are working in greyscale. Any part of the mask that is white will reveal the layer, any part of the mask that is black will hide the layer.
So let’s do a quick tutorial to show you how easy this works now.
Recently I posted a photo called “Fairies in the Garden” on my Facebook page. This photo is really cute and was assembled using layer masks so I’ll use this as an example for the tutorial.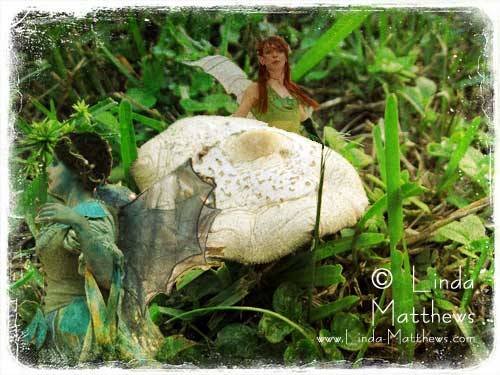
Download my toadstool image (right click and save).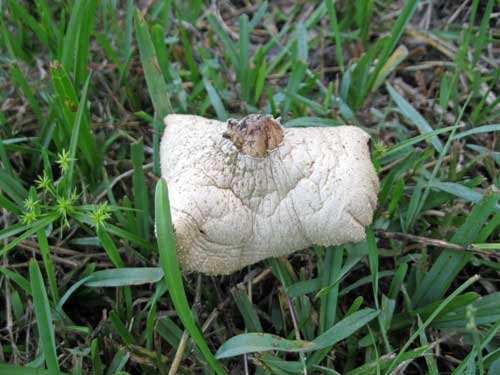
And you’ll find the cheeky fairy here on Flickr.
Open both images in Photoshop Elements and resize the fairy to 300px wide.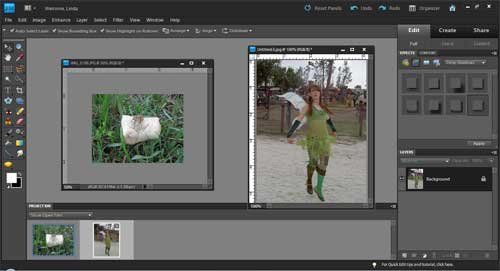
Using the quick selection tool …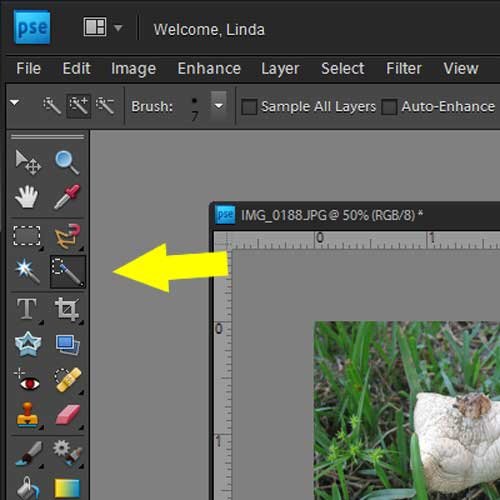
… select the outline of the fairy …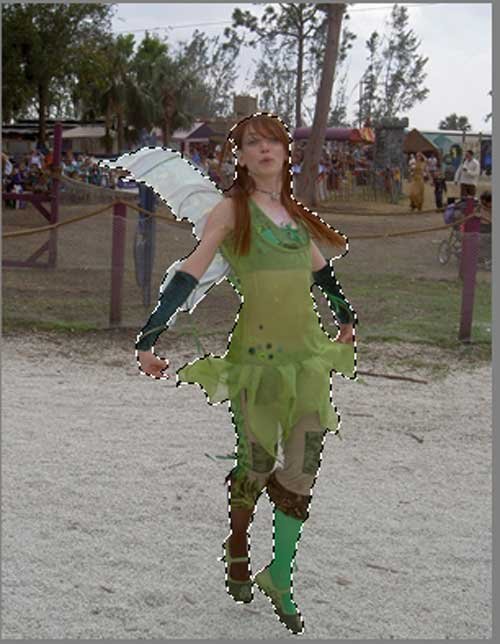
… and copy and paste her into the photo of the toadstool.
You can see that she’s standing in front of the toadstool, but I’d like to move her behind it.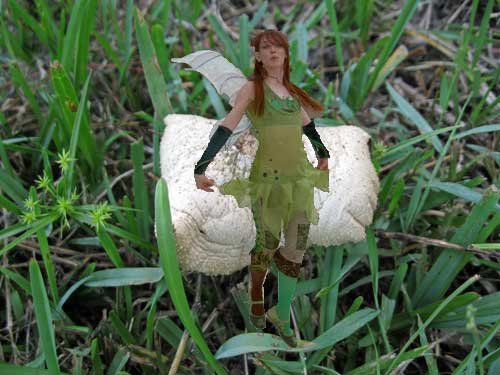
Right click on the toadstool image in the layers palette and select Duplicate Layer.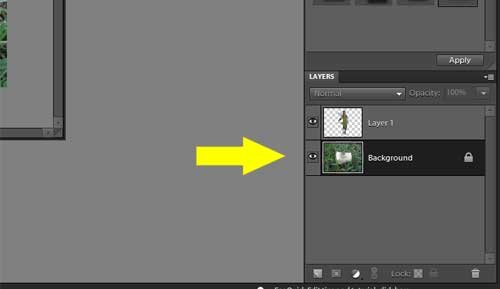
This makes a copy of the toadstool photo.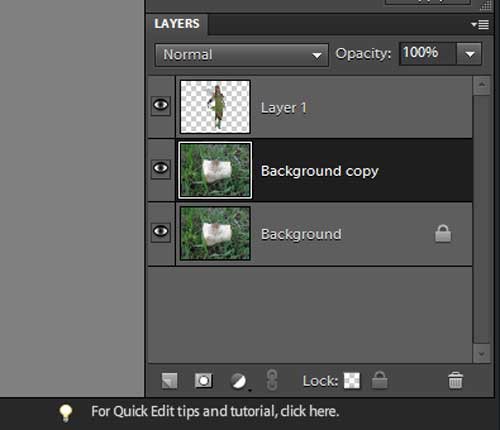
Drag the copied layer so that it’s sitting on top of the fairy layer. Make sure this layer is selected. You can tell it’s selected because the background turns dark.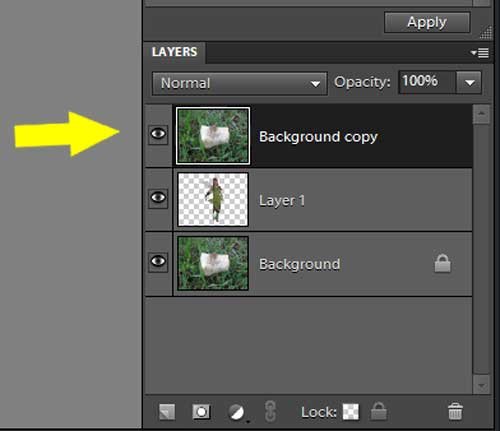
Now you can see that the fairy has temporarily been hidden from the main image.
With the quick selection tool …
.. select the outline of the toadstool.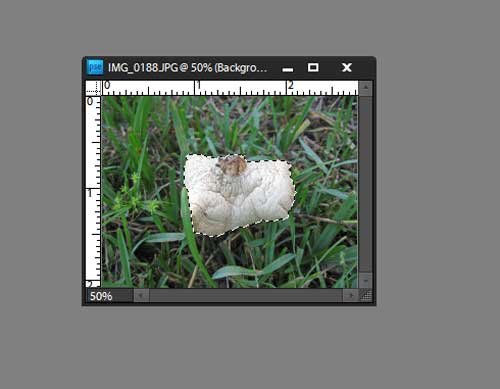
Select the color Black for your foreground color.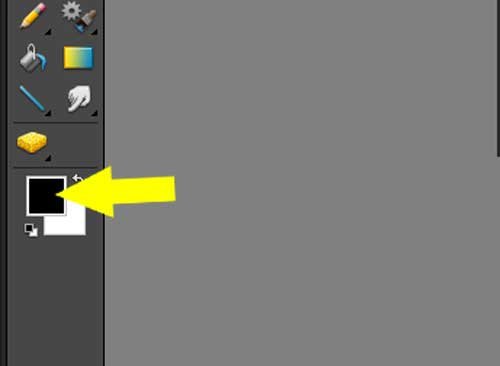
Click the Layer Mask Tool which is the square icon with the little circle in the center located on the bottom of the layers palette.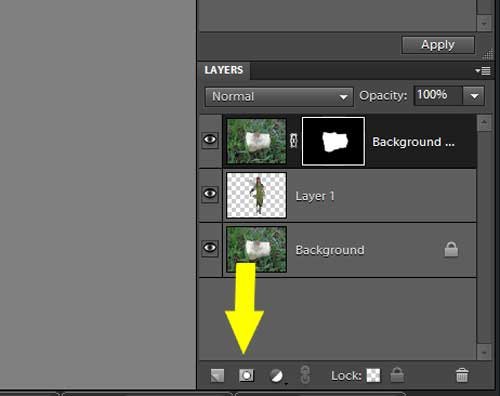
This adds a layer mask to the copy of the toadstool image …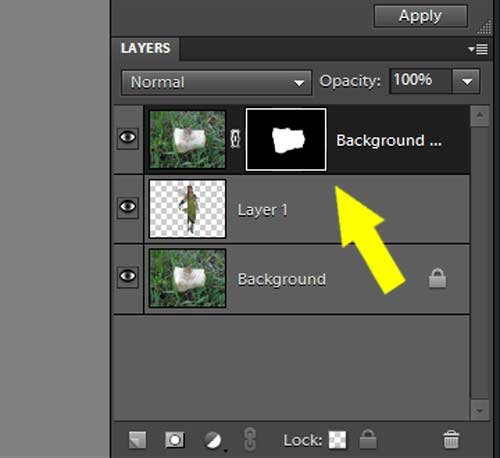
… and automatically hides the background on that image, leaving only the toadstool visible, and revealing the fairy who is now peaking out from behind the toadstool.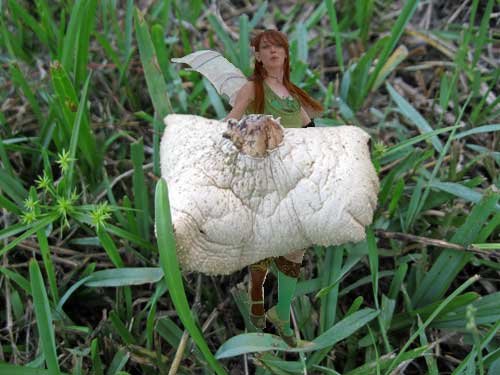
You can see how this works by looking at the layer mask. The outline of the toadstool is white – which is revealed, and the background is black – which is hidden.
Pretty cool, huh? And easy too with the one click layer mask tool. I love it!


