
Using cording to finish the edges of your sewing projects definitely adds a professional quality, however it isn’t readily available in a wide variety of types or finishes which tends to limit its uses.
Making your own cording is not only fun, but it can be made in any color or thickness to coordinate with all your sewing projects. There are several ways to make your own cording, but machine wrapped cording, which is cording made using a sewing machine, is the quickest method. This type of cording is probably my favorite and I use it as a trim and also for embellishing and it can be used for all sorts of different ways.
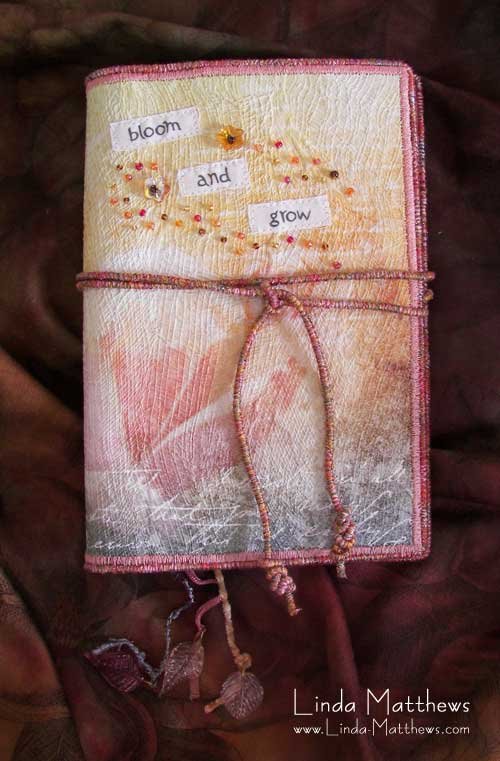
For edging and wrap-around ties on fabric journals
For edging and also to hide the joined edges on fabric boxes

For more functional purposes as part of the closure on the lid of this fabric box

And even for decorative elements on art quilts

What You Need
- Sewing machine
- Machine Feet
You can use a standard sewing machine foot, however a foot with a “tunnel” underneath, such as a beading foot or cording foot is ideal.

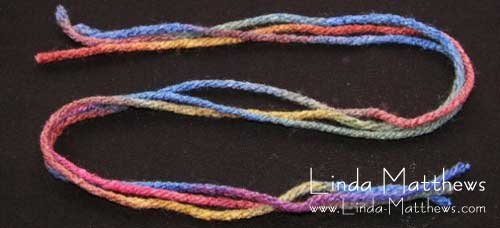
- Base Cording
Anything that is flexible and thin enough to fit under the foot of your sewing machine will work for this type of cording such as yarn, strips of fabric, string, old embroidery thread, old piping or cording - Thread
You can use a variety of threads in cotton, rayon, polyester and metallic. This is a great technique for using up any old thread that you have lying around.
Instructions
Set up the sewing machine with the same thread on top and in the bobbin. This can be any color or type of thread as it won’t show once the cord is finished. Cut the base cording to the desired length. In this tutorial I’m demonstrating using three strands of 8 ply yarn which will produce approx 1/8″ diameter cording.
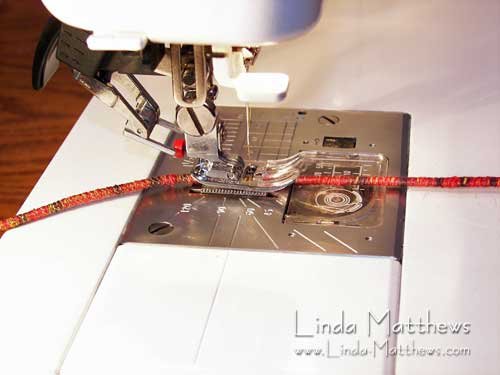
Set the sewing machine for zigzag stitch wide enough for the needle to swing entirely over the yarn on either side. Length should be about 1.5 – 2.0.
Allow about 2-3 inches of cording to extend out the back of the machine, and holding the tail of the cord with your left hand and twisting the front section with your right hand, guide the cording under the foot. If it’s difficult to move the cord, loosen the tension on the presser foot if your machine has this option, or you may need to pull the cord slightly in order for it to feed through smoothly. Zigzag along the length of cording. This row of stitching will bind the separate pieces into one.

Shorten the length of the stitch to about .5, or shorter if you’re using fine thread, and holding the cording in the same manner as previous, satin stitch the length of the cording. This row of stitching helps to cover the base cord.

Change the top thread and bobbin thread to the main color of the cord. Using the same stitch length, satin stitch the length of the cording. This is the finishing row of stitching.

If you want a bit of sparkle, finish the cord with metallic thread. Lengthen your stitch to 1.5 – 2.0, change to a metallic thread in the top and bobbin and zigzag the length of the cording.
It takes a little practice, but once you get the hang of it, you’ll be hooked!
Tip
If you sew a length of fine craft wire into the first or second row of stitching, you can make cording that you can shape and bend.


