 There are a number of ways to make a vignette and there are a number of different types of vignettes. This tutorial shows how to make a vignette that fades the edges of an image.
This tutorial is presented using Photoshop Elements, but the instructions should be similar in Photoshop.
1. Download the image.
 |
Download hands from Morguefile.com |
2. Once you’ve downloaded the image, open it in Photoshop ELements.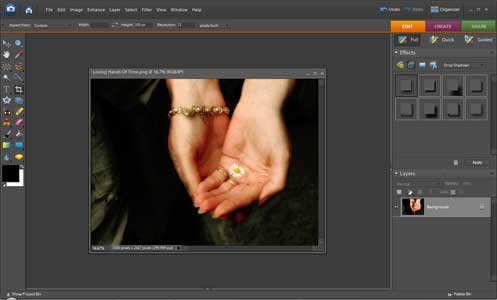
3. Select the elliptical marquee tool.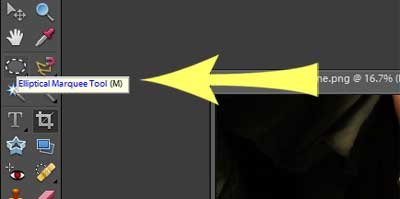
4. Enter the radius. I chose 200px, but if you have resized your image, you may need to adjust this number.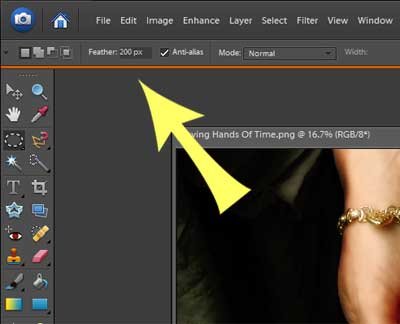
5. Click and drag the tool around the area you want to keep which is the hands and invert this area. You can invert it by selecting from the Main Menu
Select
Inverse
Or use the keyboard shortcut Ctrl+Shift+I
6. Make sure the background color is set to white, then press Delete …
and you should now have a nice soft faded edge around the hands.
You can see in my final photo that the bottom edge was clipped a bit so you may need to play around with the radius number and the area selection in order to get a good result, and if it isn’t successful the first time, use the undo button and do it again.
Tip: You can set the number of “undos” your program will allow by changing the setting. From the Main Menu select
Edit
Preferences
Performance
Then set the number of undos in the History & Cache setting. The higher the number, the more resources the program will use and this may slow down your computer performance so you may want to play around with this setting.
If you found this tutorial useful please leave a comment and let me know 🙂


