Learn how to make a hidden spine for your junk journals and other types of handmade journals.
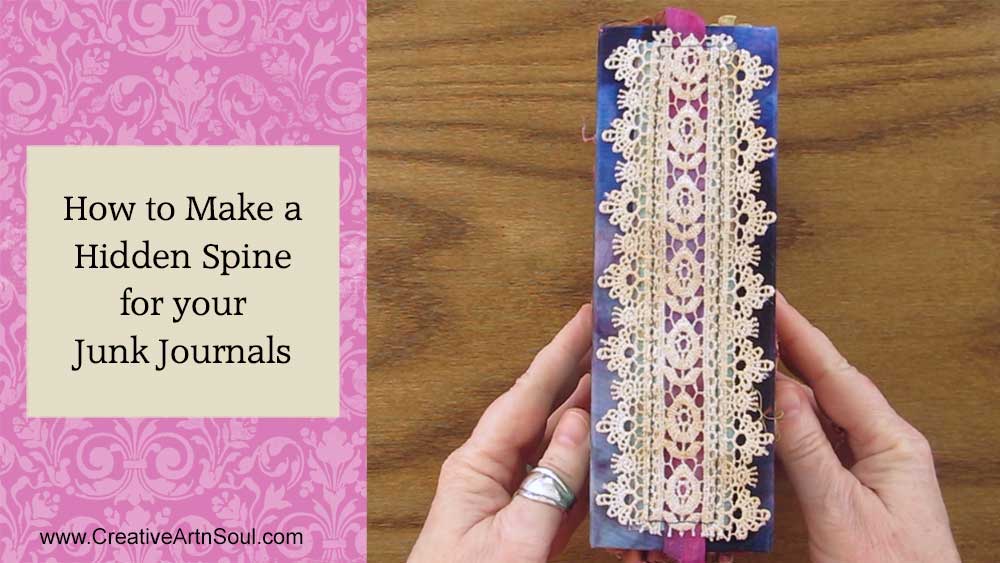
Junk journals with exposed spines are perfect for displaying beautiful hand-stitched bookbinding techniques. But for spines where you want to showcase bits of lace, ribbon, or other embellishments, making a hidden spine is a better choice.
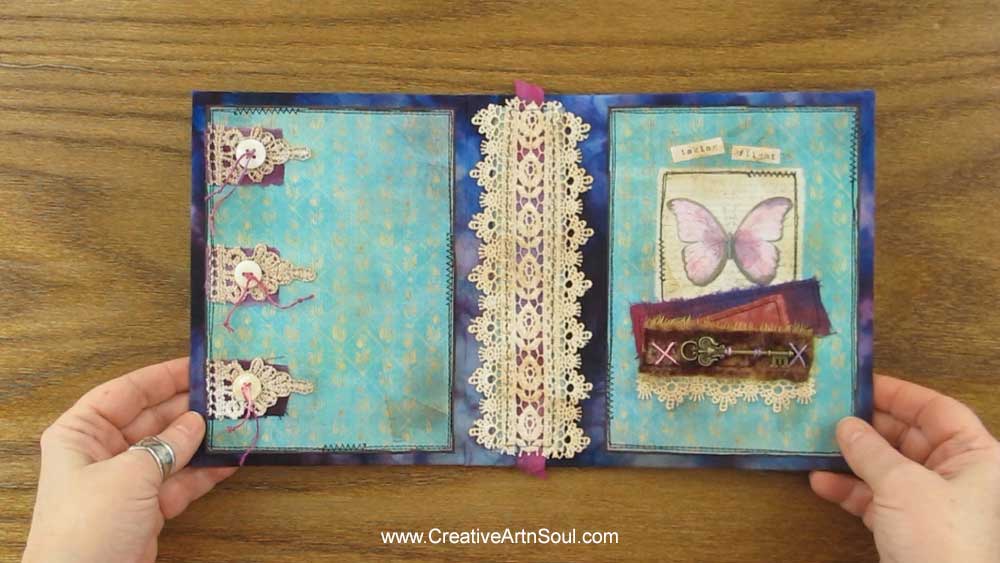
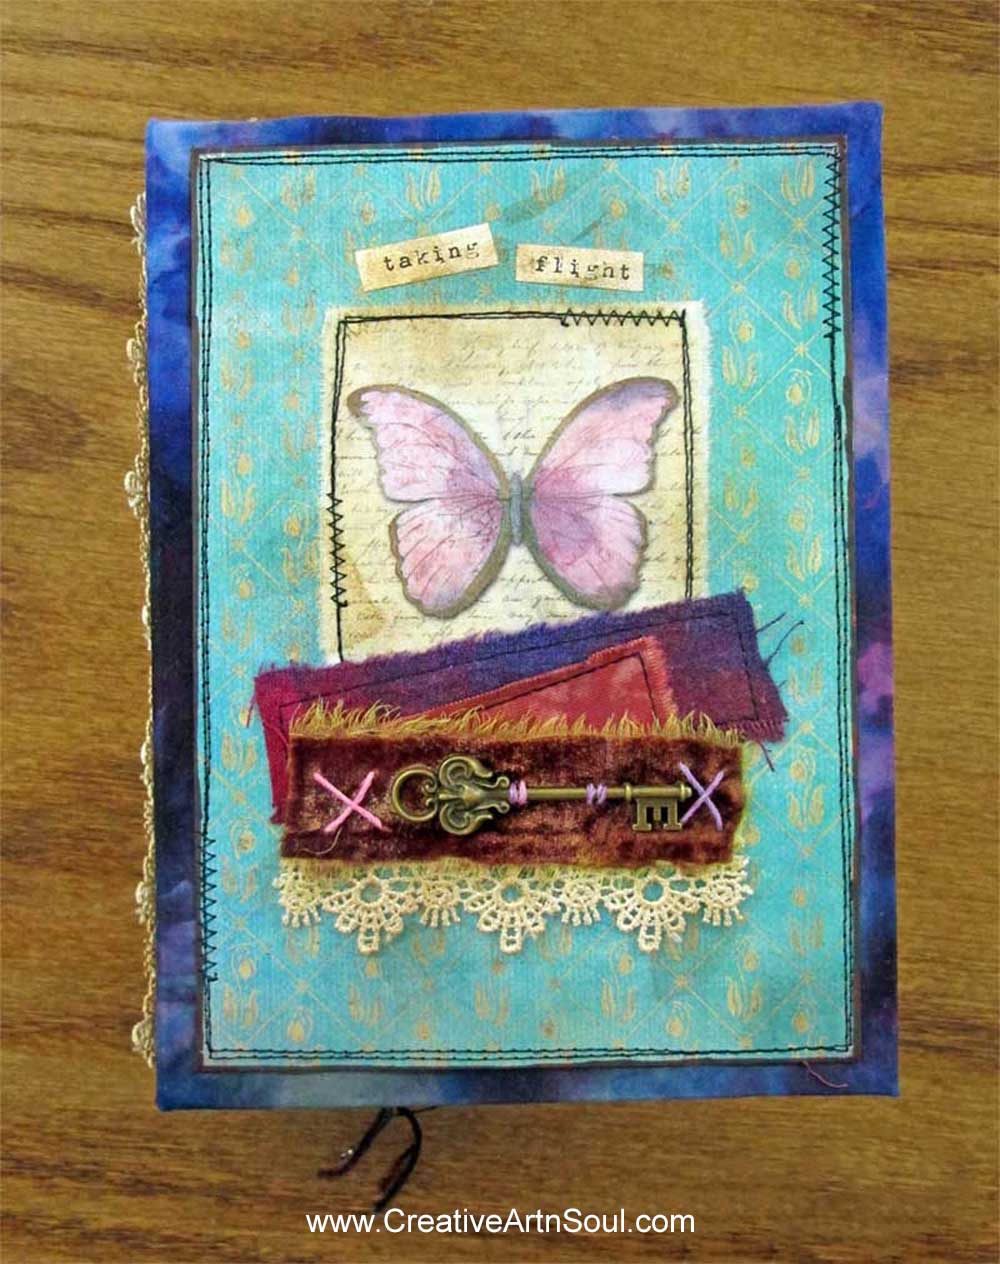
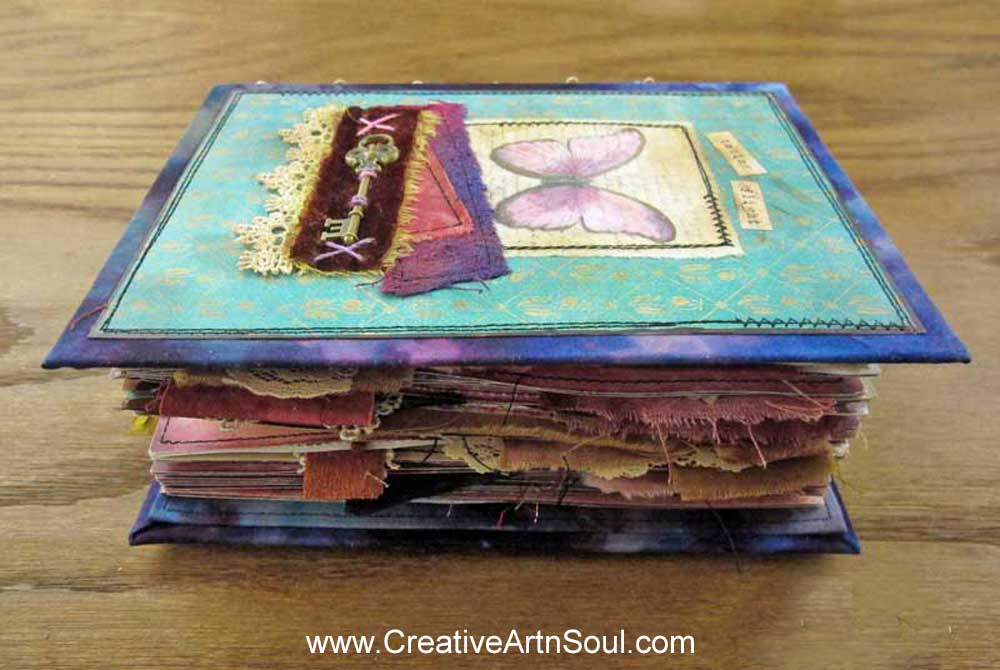
For this junk journal, which is themed “Taking Flight”, I wanted a cover that looked like a book cover with no stitches showing on the outside.
It was a bit of trial and error trying to figure out the best way to do this, but the journal finally came together better than I expected and I made this video tutorial showing you exactly how I did it!
This stitched mixed media journal was made using pages from my printable journal kit Taking Flight, which were printed and then embellished with fabric collages and other types of page embellishments.
How to Make a Hidden Spine for your Handmade Journals
Supplies
- Taking Flight Printable Junk Journal
- Chipboard Sheets12″ x 12″
- Pellon Craft-Fuse Stabilizer
- Pellon Wonder Under Fusible Webbing
- Teflon Craft Sheet
- Clear Tacky Glue
- Binder Clips
- Book Binding Needle Thread Kit
How to Make the Hidden Spine
This stitched mixed media journal was made using pages from my printable journal kit Taking Flight, which were printed onto cardstock and then embellished with fabric collages and other types of embellishments.
When designing this journal, I wanted to assemble the pages into a journal with a hidden spine, and in such a way that the pages weren’t squashed up.
The easiest way to do this was to attach the pages back to back and use four pages per signature. Then each signature could be stitched onto the spine leaving plenty of room in between.
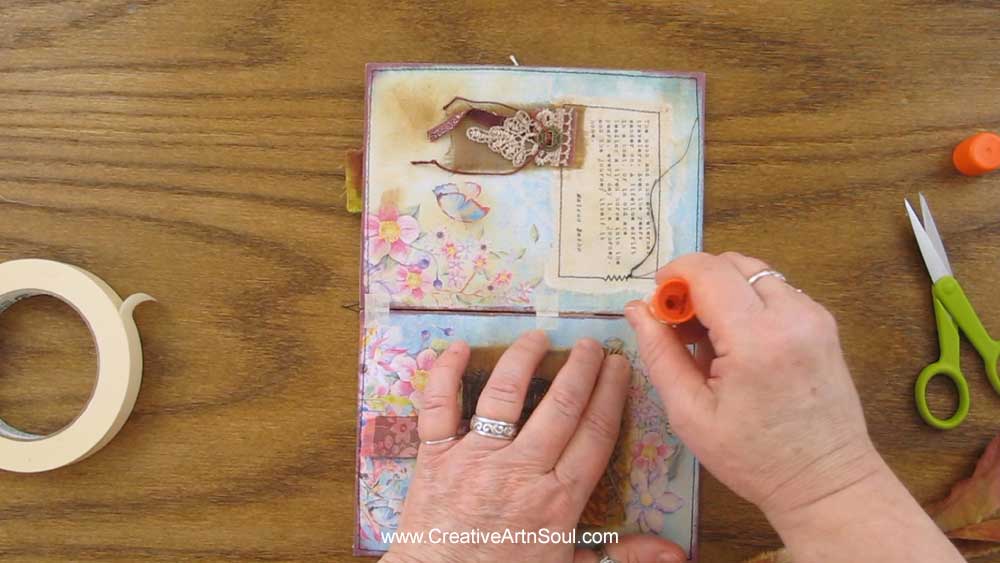
I wrote the number of each page on a scrap of paper and attached it with a paper clip so the pages were in sequence, then I aligned the pages back to back and machine stitched close around the outer edges.
To join the pages to make the signatures, I first aligned the facing pages and attached a small piece of masking tape at the top, bottom, and middle to hold the pages in position. I left a small gap in-between the page sets so that they would fold over easily.
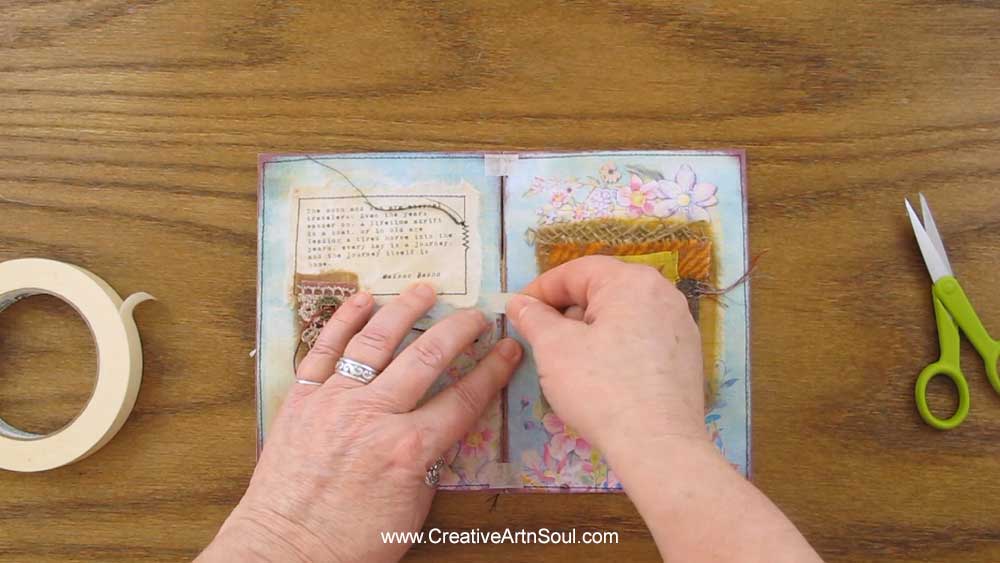
For each signature, I tore two strips of fabric about 1.1/4″ wide by about 1/2″ longer than the page length.
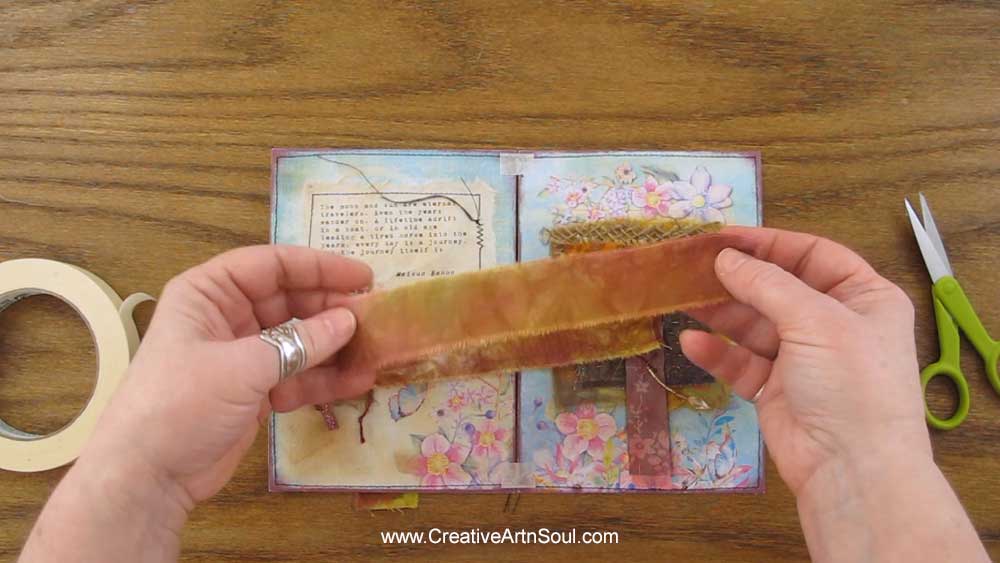
I folded the strips in half lengthways and made a crease down the center of each of the fabric strips to make it easy to line them up along the center of the pages.

Using a glue stick, I applied some glue down the center of the pages to hold the fabric strips in position while I sewed them on. I then positioned one fabric strip on each side of the page set.

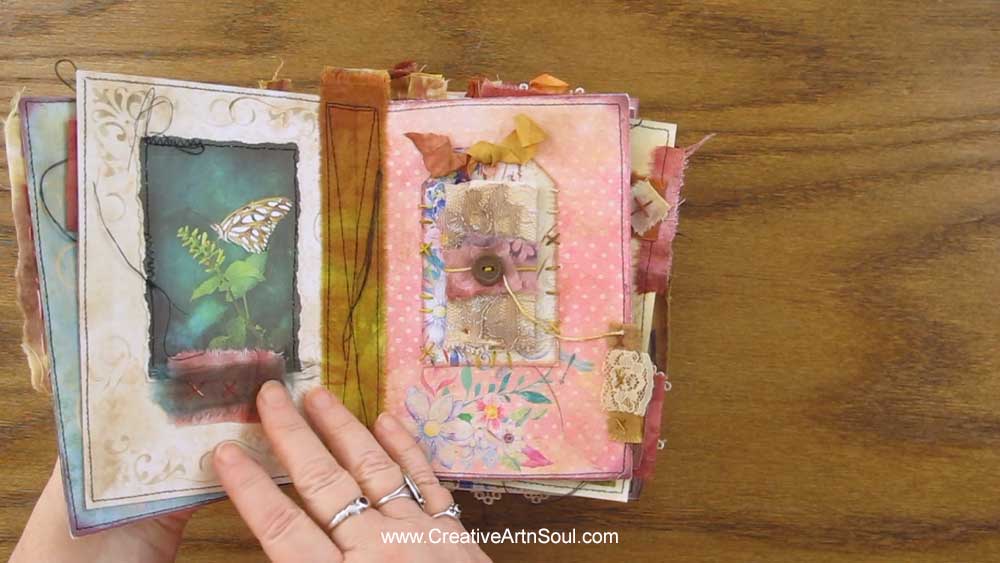
I machine stitched each of the page sets together along the strips of fabric, and ended up with 8 signatures which is a total of 32 pages.
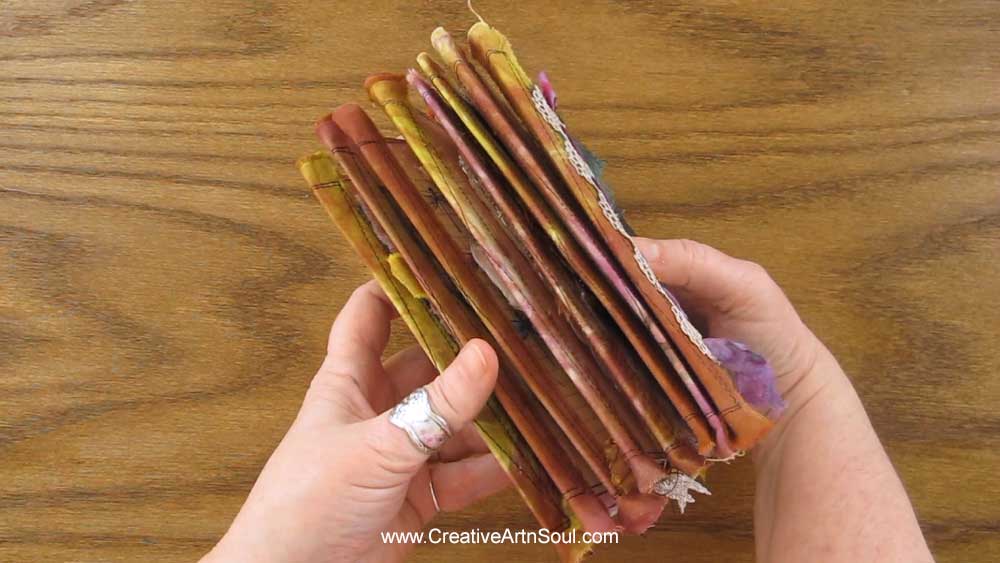
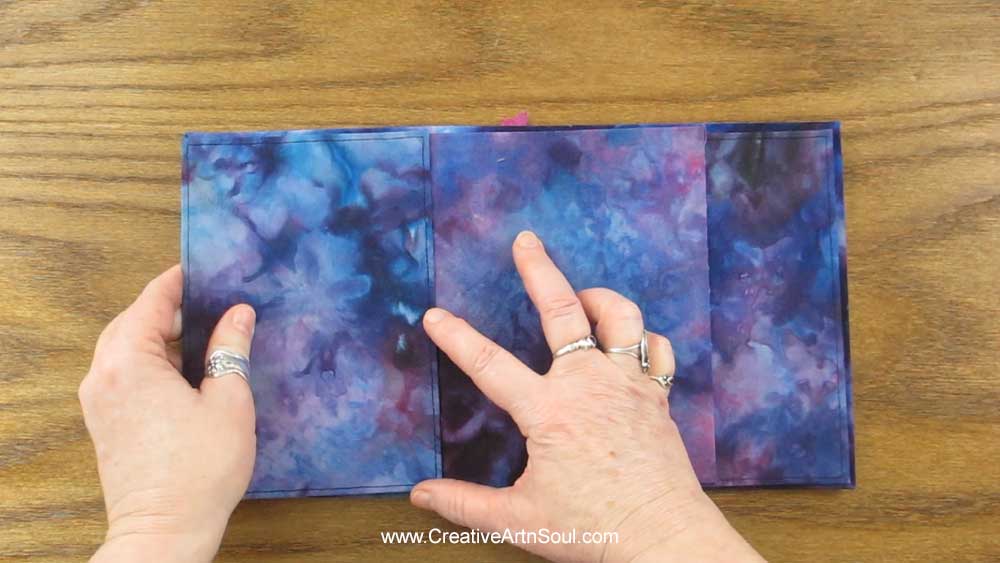
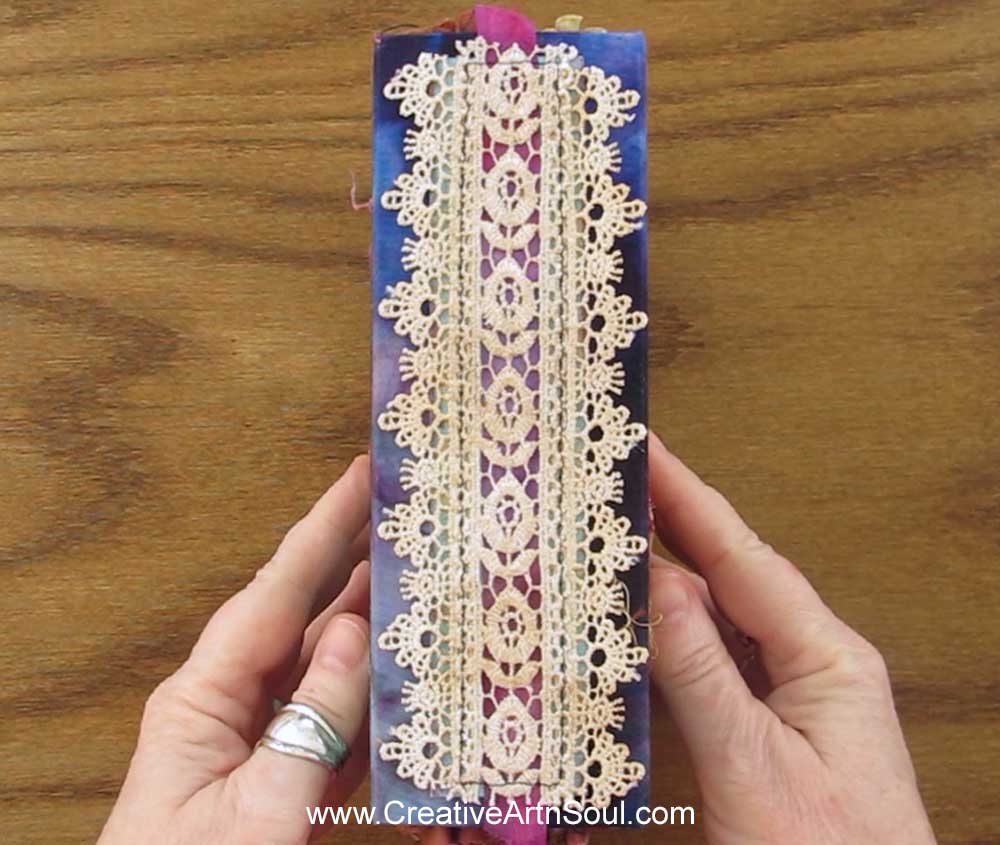
To make the cover, I first stacked the signatures together and measured the width which was 2-1/2″. I then cut the cover pieces out of chipboard which is thick and rigid, but also can be easily sewn.
I cut the front and back cover 1/2″ longer and wider than the pages, and I cut the spine at 2-1/2″ wide by 1/2″ longer than the pages. The finished size of the cover is 7-1/2″ by 5-1/2″ by approximately 2-1/2″ deep.
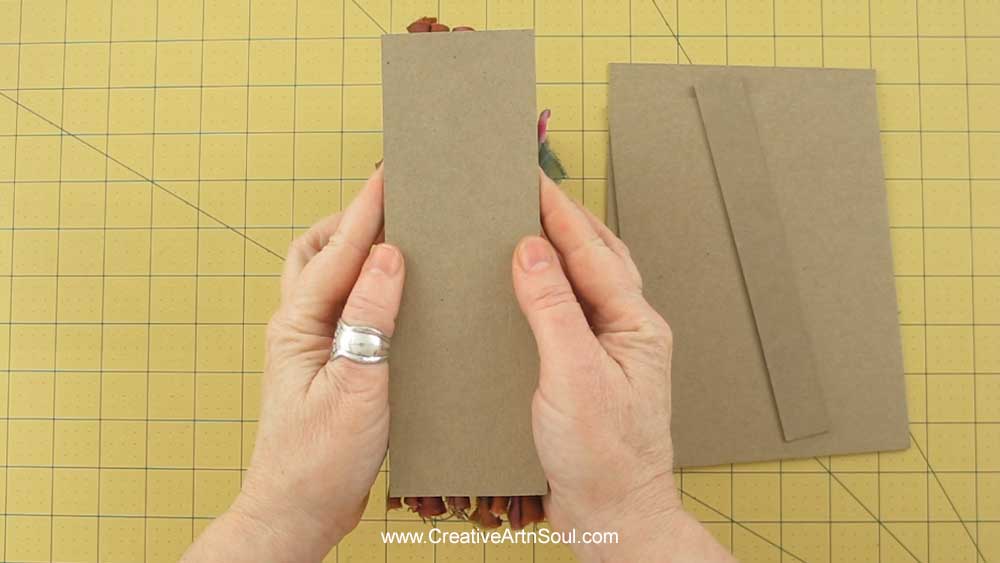
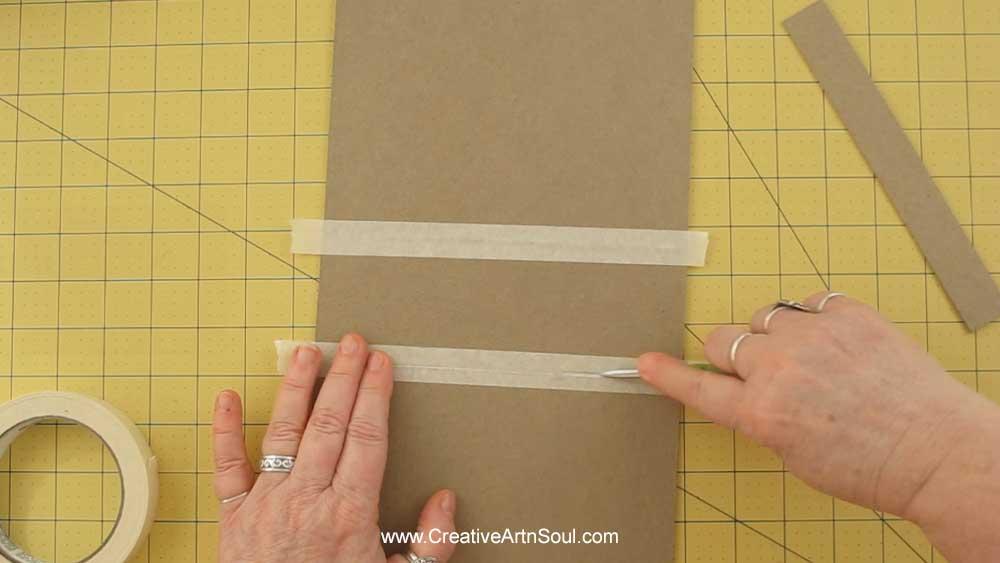
To make this type of book cover when using chipboard, you need to be sure to leave a gap between each of the pieces to allow the cover to fold easily. So I laid out the cover pieces and used some masking tape to hold the pieces in position.

The width of the gap between the sections should be about the thickness of the chipboard. You can cut a small section of chipboard to use as a gauge.
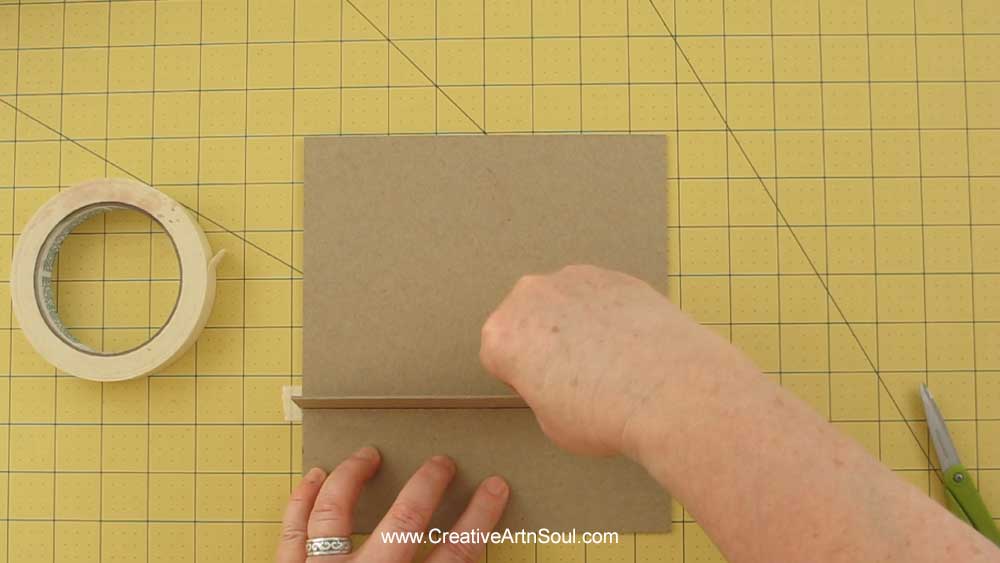
Use masking tape on both sides to make sure everything is held in place securely then using a bone folder or paper creasing tool, or even the edge of a pair of scissors, press the masking tape into the gaps.

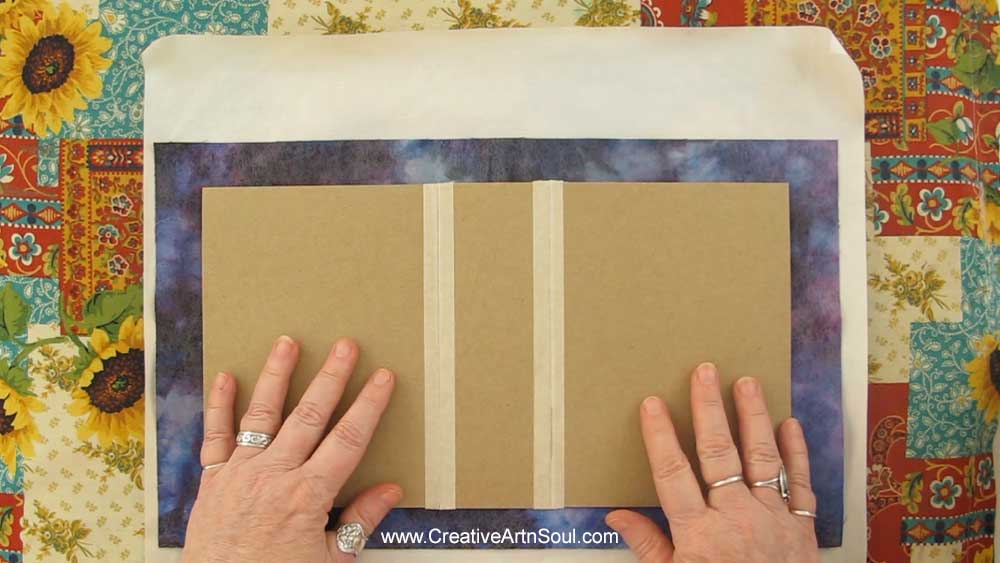
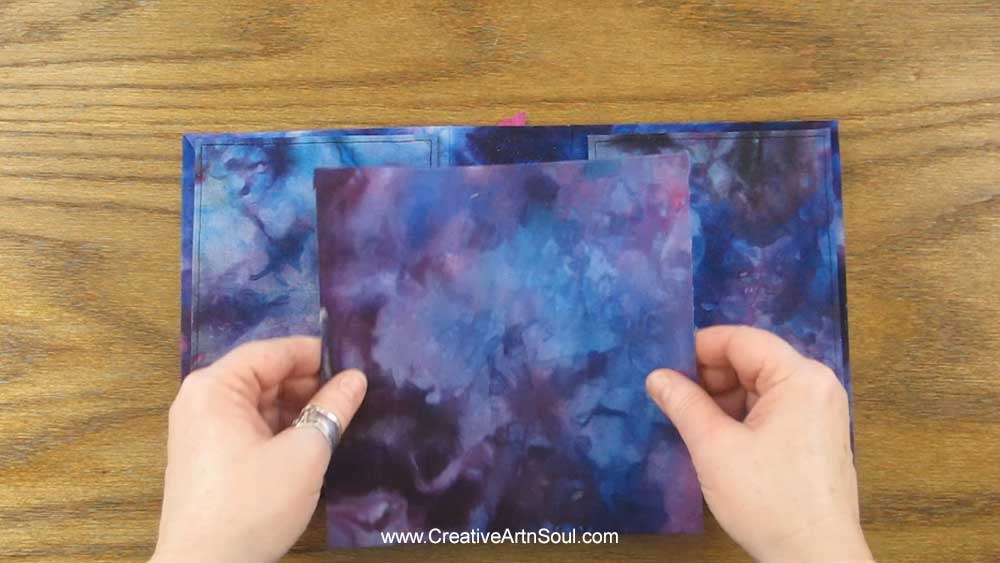
To cover the chipboard you could use some sort of decorative paper or scrapbooking paper, however I’m using some of my hand dyed fabric.
I cut the fabric about 1″ wider and longer than the cover, and instead of using fabric glue or tacky glue to attach it, I’m using fusible webbing.
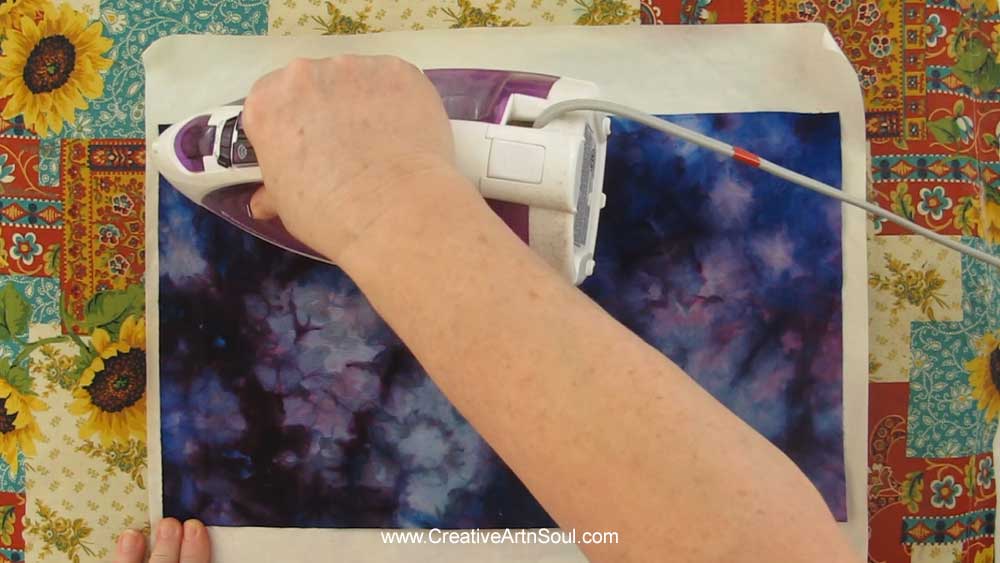
Fusible webbing is less messy to use when working with fabric because it won’t seep through like glue does, and you can more accurately position things.
Fusible webbing works in the same way that glue does. To use it, you iron it to one side of the fabric, then iron the fusible side of the fabric to the other surface.
You can use it to bond fabric to other fabric pieces and you can also use it with chipboard as I’m doing. Once fused, it bonds permanently.
When using fusible webbing, use a teflon craft sheet or a piece of parchment paper to protect the surface of your ironing board or counter top. Then iron the fabric to the chipboard.
Once the fabric is ironed in place, carefully fold over the edges and iron them to the inside of the cover.

You could miter the corners by cutting away the excess fabric, however I just folded them at an angle and pressed them with the iron.
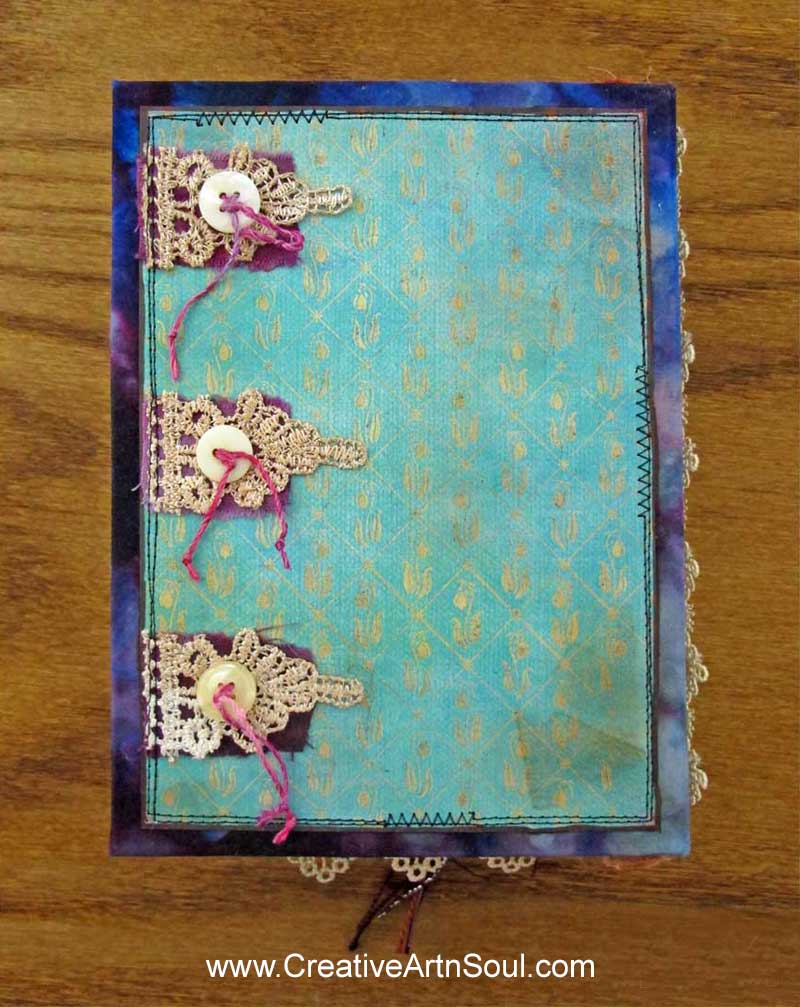
To finish the cover I printed out the cover pages from the journal kit onto cardstock, and added some additional fabric and lace embellishment. Then using a sewing machine, I sewed those pieces to the front, back and spine. Chipboard is easy to sew through.
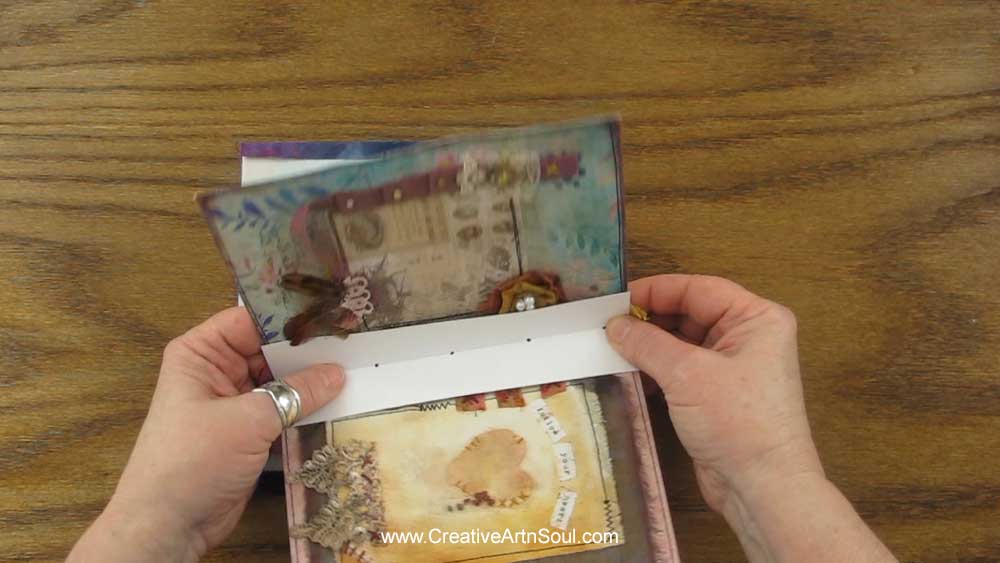
The inside cover took some figuring out because I wanted the stitches where the signatures attach, to be hidden inside the spine.
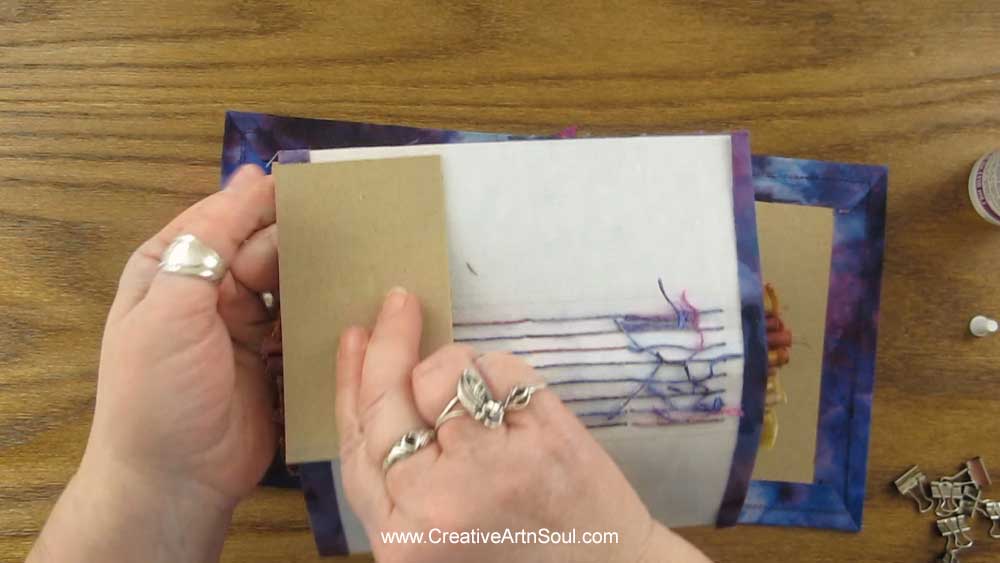
For the front and back, I cut two pieces of cardboard from an old pizza carton, ironed the fabric to one side of the cardboard using fusible webbing in the same way as for the outside of the cover, and then I sewed it all the way around the edges.

I cut the front and back cover pieces about 1/4″ shorter in height and several inches shorter in width.
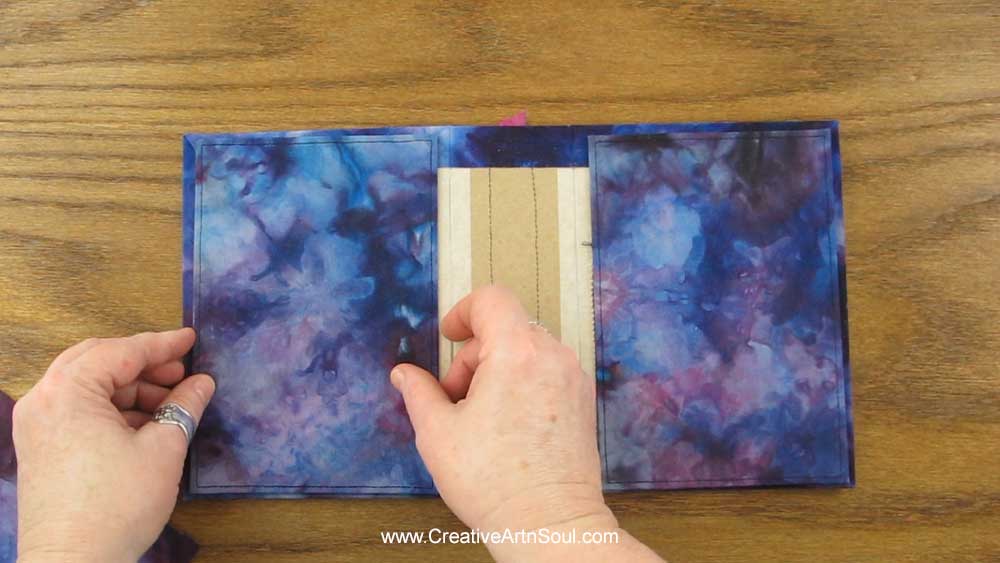
I cut the spine section the width of the spine which is 2-1/2″ plus an extra 2″ on both sides.
Once the spine is glued in position the extra wings on the spine will be glued in place underneath the inside cover sections.
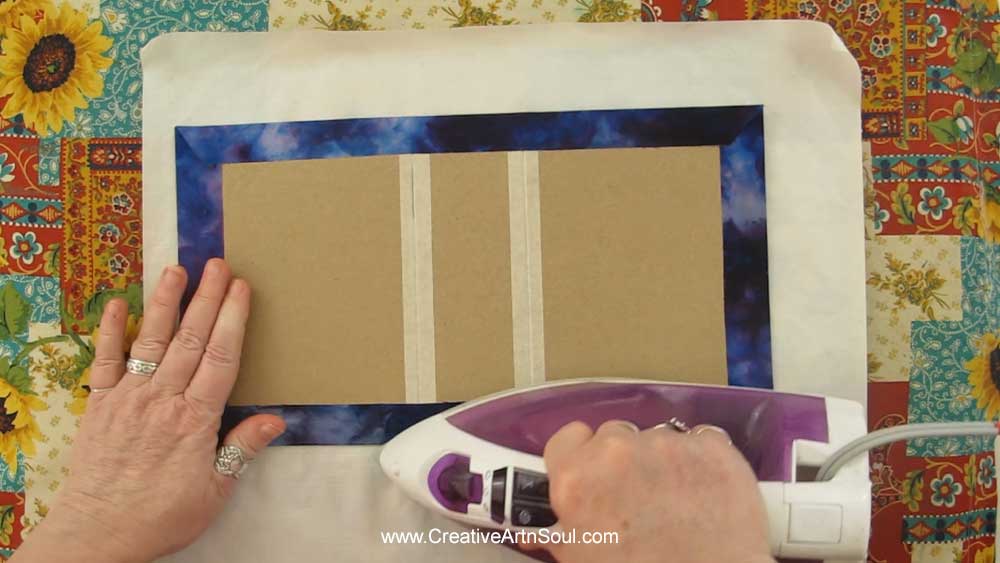
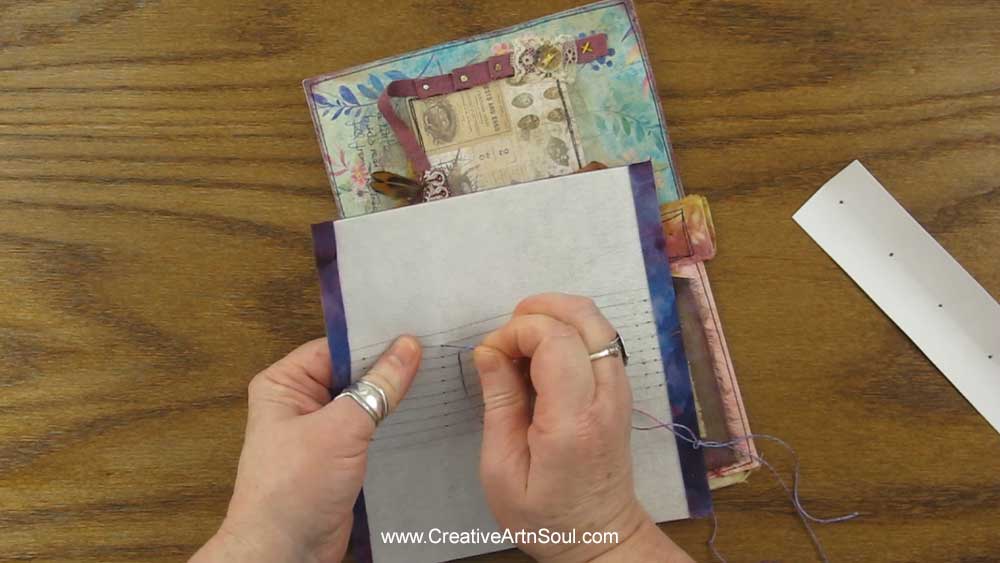
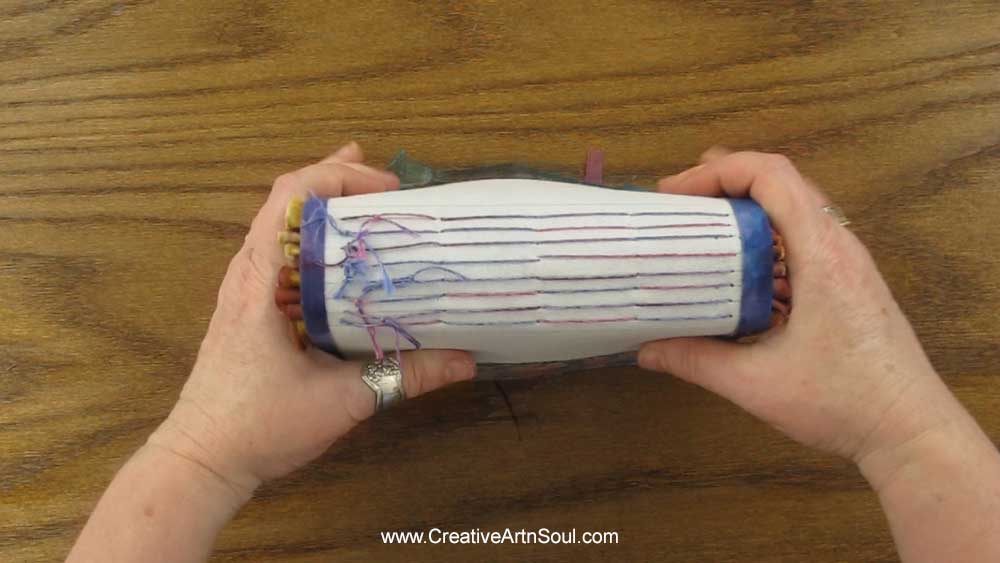
I made the spine section using craft-fuse stabilizer which is strong and flexible, and to make sure things didn’t fall apart, I ironed two pieces together for extra stability.
I ironed a piece of fabric to one side of the craft-fuse using fusible webbing, and on the other side I marked where the eight signatures would be sewn using a 5 hole pamphlet stitch spaced 1/4″ apart.
To make the spine section I ironed a piece of fabric to one side of the craft-fuse using fusible webbing and folded it over the top and bottom ends to hide the edges.
On the other side I marked where the eight signatures would be sewn by drawing a set of vertical lines centered on the fabric and spaced 1/4″ apart. I marked one line per signature. I then marked 5 holes along each line with equal spacing in between for the stitching holes.

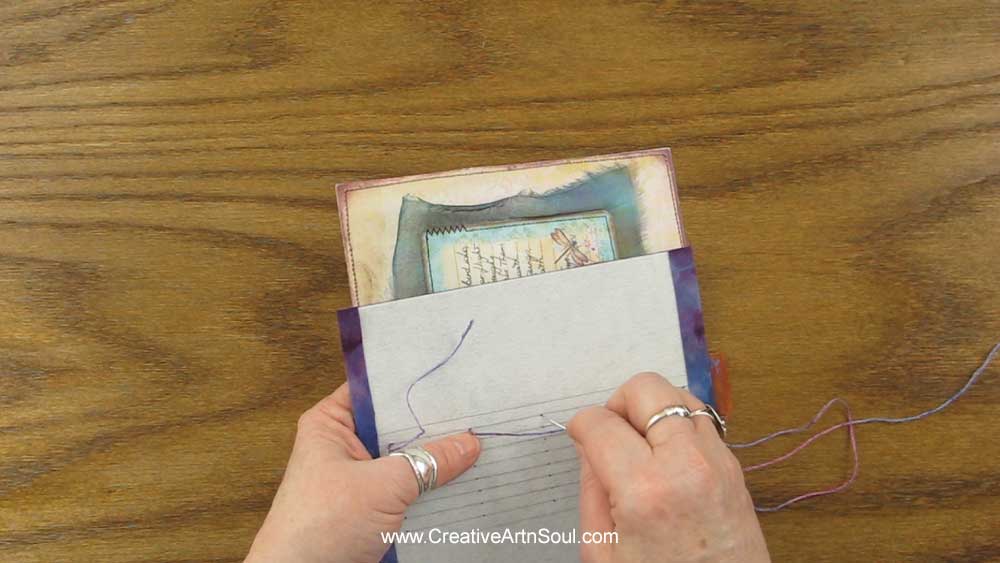
I made a hole template from a piece of cardstock, marked the hole positions for the signatures, poked a hole through each mark, then made a fold down the center.
To use the template, simply position it over the center fold of the signature, and using a felt tipped marker, mark the position for the holes.

To sew the signatures, use strong embroidery thread or book binding thread, and a tapestry or embroidery needle.
Before attaching the signatures, to make it easier to sew, I first put holes in the spine section using my needle.
Starting at the top on the underside, bring the needle through to the inside leaving a thread tail of approx 3-4″. Then bring the needle back out to the outside, then back again to the inside. Continue sewing to the end, then all the way back again.
Once you’ve sewn back to the top, tie the thread off in a knot on the underside. Continue adding the additional signatures in exactly the same way.

Once all the signatures are sewn, use fabric glue or tacky glue and apply the glue liberally along the spine and over each of the side pieces. I used a small piece of cardboard to spread the glue.

Once the glue has been applied, position the spine on the inside of the cover and press in place.

I used a creasing tool to push the fabric into the space on the cover between the spine and the cover section. This will allow the cover to open and close a little easier, without stretching the spine section too much.

Once the spine section was in place, I attached some binder clips to hold everything together while it dried overnight.
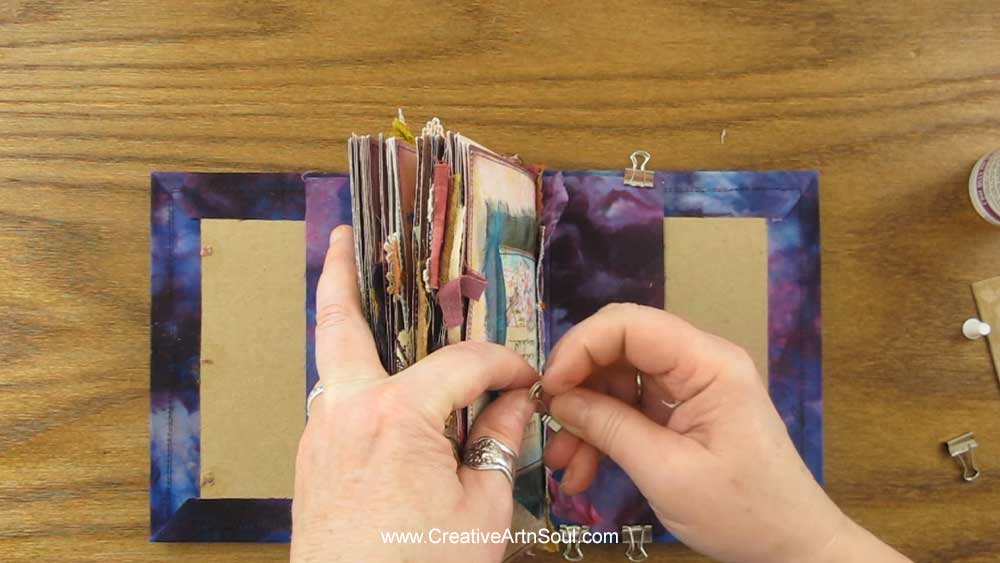
With the spine in place, I then glued the inside back and front cover sections in the same way.

I’m really happy with the way this journal turned out. The stitches are perfectly hidden inside the spine section, and the assembly works perfectly for journals with thick collaged pages.

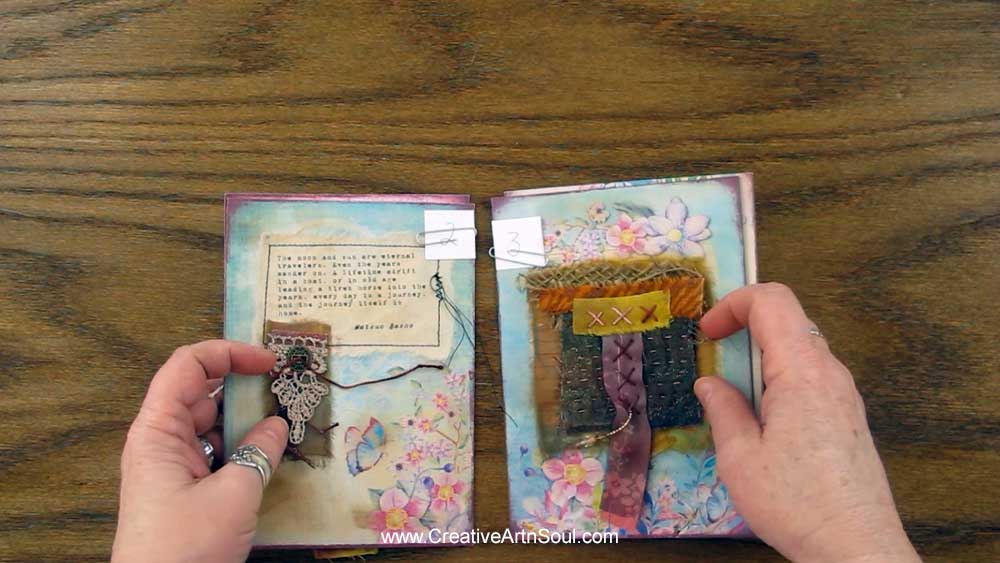
A Quick Flip-Through of the Pages
Save this pin to your favorite Pinterest board!