
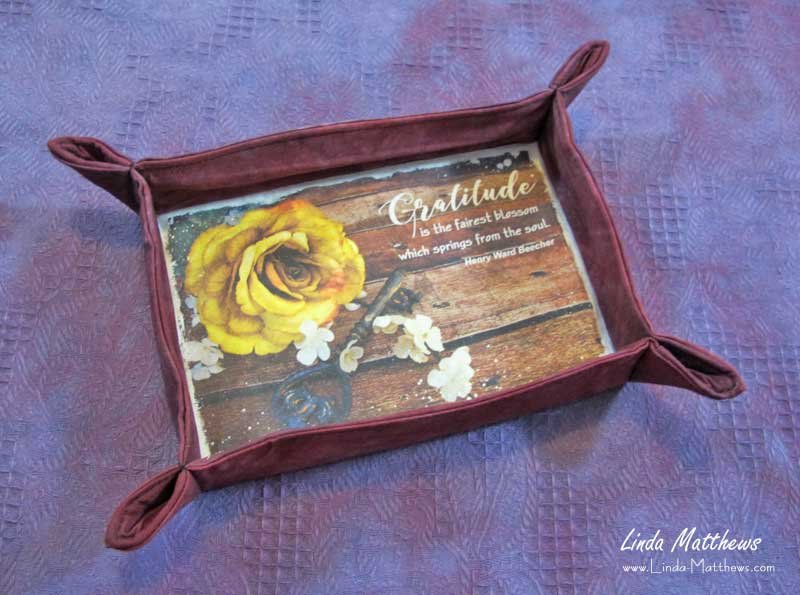
Fabric trays are quick and easy to make and are so useful in the sewing room for holding needles and threads and other small items. I like to be creative in my design, so my favorite method of making these fabric trays is to print my PhotoArt designs onto fabric and then use them as the base for my fabric trays.
As we are just about to celebrate Thanksgiving here in the US in a couple of weeks, there’s no better time to be reminded of just how much we all have to be grateful for so I designed a special “Gratitude” fabric tray.
Fabric Tray Tutorial
I’ve designed lots of these fabric trays over the years in all sorts of sizes, using all sorts of different PhotoArt designs. And you don’t have to use a printed image, you could also use any other type of fabric to make them.

To make a 6″ x 4″ tray you’ll need
- 6″ x 4″ PhotoArt image printed onto fabric. When trimming, leave a 1/4″ seam allowance all the way around, so cut size should be 6-1/2″ x 4-1/2″
Learn how to create PhotoArt in this online class
Learn how to print images onto fabric in this online class - Borders – four pieces 1-1/2″ x 6-1/2″
- one piece Peltex heavyweight stabilizer 6″ x 4″
- two pieces fusible stabilizer such as Pellon Craft Fuse 8-1/2″ x 6-1/2″
- one piece backing fabric 8-1/2″ x 6-1/2″
Instructions
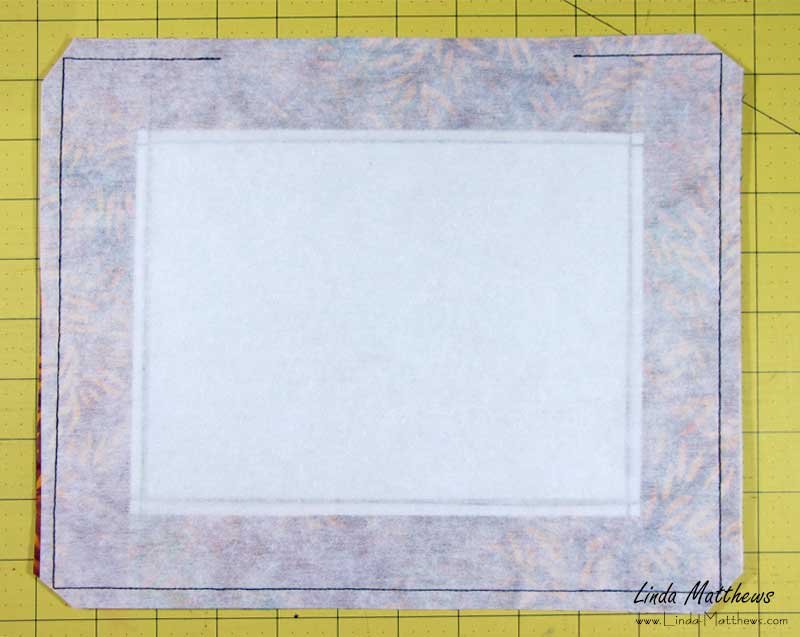
Print the PhotoArt image onto fabric, then using a 1/4″ seam, sew the borders to the top and bottom, then the left and right sides. Press.

With the wrong side facing up, center the Peltex on top of the printed PhotoArt, then place the Craft Fuse on top.

Fuse the Craft Fuse to the top section ensuring that the Peltex doesn’t shift. Fuse the other piece of Craft Fuse to the back section.

With right sides facing, sew the front to the back leaving a gap along one long edge large enough to turn the fabric right side out. Snip the corners at an angle.
Time saving tip
Use a hera marker to make a crease along the seamlines of the opening. This makes it super easy to fold under a perfectly accurate seam. If you don’t know what a hera marker is, you can find more information here.

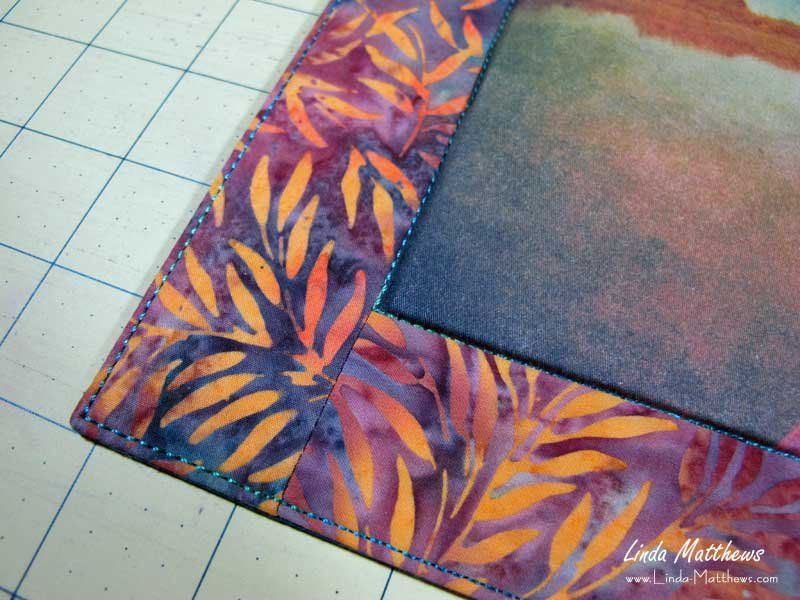
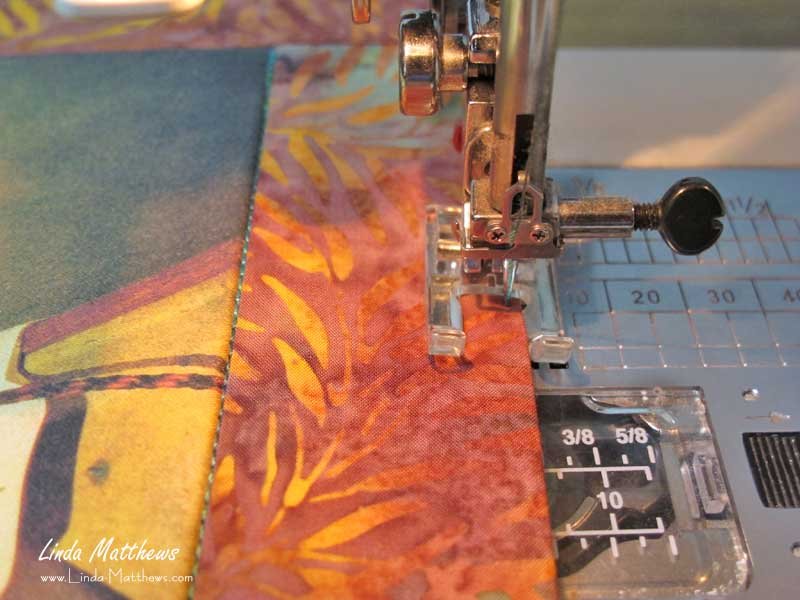
Turn the fabric right side out, carefully poke out the corners, and pin the opening closed. Stitch in the ditch around the focus fabric. Top stitch around the borders close to the edge.
Time saving tip
When I’m top stitching around the edges I like to see where I’m going, so I use my satin stitch foot which has an opening at the front and gives better visibility. I butt the edge of the fabric right up against the inside of the right edge of the foot, then I move the needle position close to the edge. This gives a perfectly accurate edge stitch every time and you can see exactly where you’re sewing.
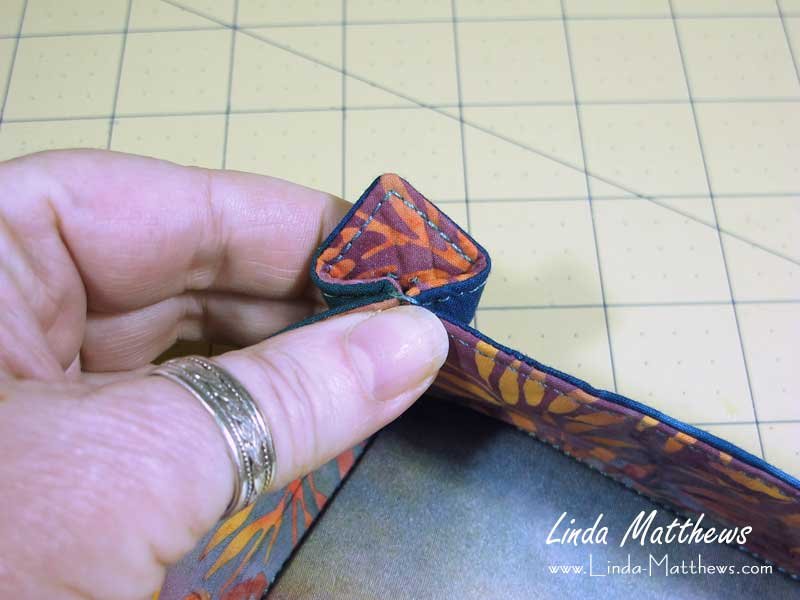
To make the corners
Pinch the corners together so that they they match along the edges.

Sew straight from the corner of the focus fabric to the edge.

For a fancy corner finish, press the point of the fold inwards and hand sew in place with a few stitches.
And that’s it!
Perfect for holding your needles and threads.


