One of my very favorite things to work with is texture on fabric. I love exploring new and creative ways to make it and to use it.
And I particularly love to use stitch as a way to create raw texture on fabric or fabric paper which can then be used for painting or printing. Using hand stitching or machine stitching or a combination of both to prepare textured fabric for painting or printing is an exciting way to add interesting and unusual texture to fabric and you can find one of my favorite pieces of stitched and painted textured fabric paper here.
And of course creating stitched texture is a great way to use all those hundreds of decorative stitches on your sewing machine. I’m sure you’ve sometimes wondered what to do with all those stitches.
So for the last few days I’ve really enjoyed preparing and working with the samples for my new art bag project and I’ve finally progressed to a point where I’m really happy with the way the technique is working.
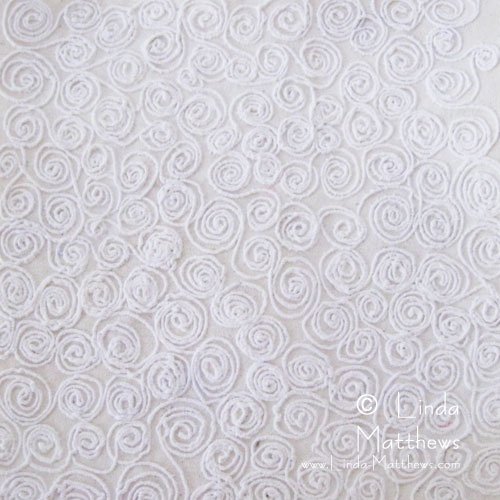
It starts with the raw stitched texture which is made using free motion bobbinwork techniques.
Then some paint.

And to really dress up the texture, some highlighting.
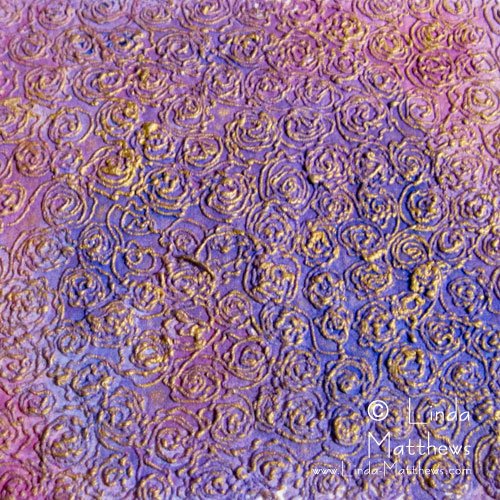
I often get asked how I do this type of highlighting. Sometimes I use gold paint and dry brush it over the texture, but my favorite method is using a burnishing wax which you can pick up in your local craft store. Adding the highlight does take practice which is the reason I always prepare samples first.

So now that I’m happy with the samples, I’m ready to move on to preparing the fabric for the art bag. I simply love working with a process; don’t you?


