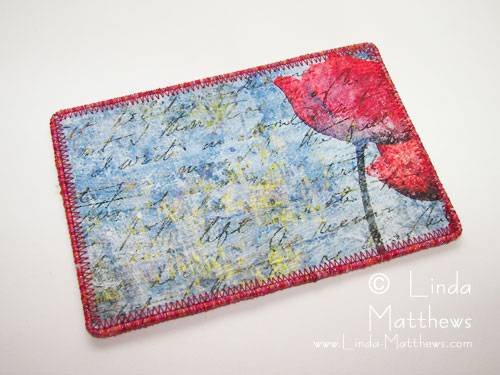
I said I wasn’t going to … but …

I love technology, I really do!

But I love my books even more.

The feel of them, the smell of them, the weight of them in my hands.

So I’ve resisted getting a Kindle. And I resisted really well until recently when I was cleaning out all my old books and I realized just how many I have. Books that I’ve read only once and know I will never read again. And I thought of all those trees and, well, now I own a Kindle.

And I kind of like it.

For some books though, not for every book.

Because there are special books – books with special words and books with lovely pictures – that absolutely deserve to be printed on paper, and I love to be curled up on the couch with those books in my hands flipping through the pages.

But there are books that don’t really serve much purpose after they’re read once except to take up too much room on my bookshelf. So those types of books are good for the Kindle.

But of course now that I have a Kindle, I just had to have a Kindle cover!

So I went through my pile of injured prints looking for a print that might work for a Kindle cover only to discover that the pile is disastrously low. Which means I haven’t been doing enough printing on fabric lately! So I will have to remedy that fairly soon.

But in the meantime, the Kindle cover nagged at me so I did a quick calculation and sure enough it was just about the same size as my Moleskine notebook cover design so I did a quick print using one of my “One Word” designs and in no time at all I had a Kindle cover made.

Printing on Fabric: Kindle

I even managed to make the corners pooch out so the Kindle lies flat.

Printing on Fabric: Kindle

And of course I used one of my favorite “One Word” designs on the front.

Printing on Fabric: Kindle

And an elastic wrap around to keep it closed.

Printing on Fabric: Kindle

I *love* it! What do you think? What do you use to keep your kindle safe?

… Continue reading

Recycling: Cell Phone Case

With the Exploring Digital Grounds on Fabric online class finally underway, I’ve at last managed to tear myself away from the computer long enough to sit down at the sewing machine and get some sewing work done!

One of the projects I’ve been trying to finish for weeks is a new cell phone case for my – tada! – new cell phone! And here it is …

Cell Phone Case

I used one of my injured prints to make the case, lined it with felt, and added a small invisible magnetic snap to keep it closed. I’m not really sure why this particular print ended up in the injured print drawer, it seemed perfect to me or maybe at the time it wasn’t quite perfect for my project. Either way I have a lovely new cell phone and cell phone case. Lovin’ those injured prints, they sure come in handy!

… Continue reading

Another Use for Injured Prints

or How I Made a Mousepad in 5 Minutes

I’ve been threatening to make a new mouse pad for quite a while, but of course my “to do” list gets longer every day and it wasn’t a priority up until the other day when I finally couldn’t stand the sight of my old mouse pad which is all ratty on the ends, is covered in coffee and tea stains and probably breakfast stains as well, and is all together quite uninspirational and virtually unusable. I’ll do you a big favor and not show it to you.

So I finally decided that I could take 15 minutes out of my day to do this small project which also happens to be another perfect project for one of my injured prints. I’ve already shown you a couple of nice projects I’ve done using injured prints … a wallet I use every day and some lovely fabric postcards.

So I dug up another injured print and rather than the 15 minutes it thought it might take to finish the project, it in fact only took about 5 minutes and I have a fabulous new mousepad to show for it! Here’s how I did it …

The first thing you need is an injured print. This was a fairly large print that slipped at the end (of course) during printing and you can see that the colors went a little screwy on the right hand side. However the rest of the print was fine and almost just the right size for a mouse pad. I painted a sealer over the top of the print so it gave it a slightly rough surface and this will also protect from spills.

Inkjet Printing on Fabric

You also need some thick stabilizer like timtex or peltex, fusible on one side …

Inkjet Printing on Fabric

… and some grip matting …

Inkjet Printing on Fabric

I wanted a finished size of 8″ x 9″ so I cut each piece slightly oversize, then fused the print to the stabilizer, cut it to size, and zigzag stitched around the edges.

Inkjet Printing on Fabric

I was then going to fuse the grip matting to the back of the peltex however it didn’t fuse too well so I ended up gluing it on which worked perfectly. The grip mat is the perfect thing to hold the mousepad in place and stop it from slipping all over the place.

Inkjet Printing on Fabric

Then I carefully trimmed away the excess matting from around the edges being careful not to cut the stitching. And …. ta! da! one fabulous mouse pad whipped up in no time at all and much better looking than my old mouse pad!

Inkjet Printing on Fabric

And don’t forget .. my favorite method of making fabulous prints (injured or not) is using digital grounds – you’ll find LOTS of info here.

… Continue reading

Making Fabric Postcards from Injured Prints

This week I’ve been super busy making some fabric postcards for the upcoming Arts on Stage event I’m participating in next month, and along the way discovered that injured prints make fabulous postcards.

This is a print that really went screwy. It was printed using digital grounds on textured fabric (it’s a real pain in the *** when these prints go wrong because it takes so long to prep the fabric) and the image printed out in a portrait orientation instead of landscape and subsequently the right hand side of the image got chopped off severely.

Fabric Postcards

However even with the chopped of main image, I thought there might be enough of the image left to make an interesting postcard.

Here’s a tip for you …

Using a “viewer” to fussy cut your fabric or images makes things a whole lot easier. A viewer is easy to make – simply determine the size of your project and for a postcard I use 4″ x 6″, then cut a hole out of a piece of cardstock. Position the cutout area over your fabric to determine what looks best for your project and when you’re happy with what you see, mark the area using a fabric marking pen or pencil then cut it out.

Fabric Postcards

This is what was I ended up with for my postcard which looks kind of interesting don’t you think?

Fabric Postcards

And if you’ve never made a fabric postcard before, they can’t get much easier than this. For my image transfer fabric postcards I print out my image (or in this case I salvaged one from an injured print), cut to size some fusible peltex and a piece of cardstock for the back (I like to use a pre-printed backing on my postcards and if you want a copy you can download a copy here then print it out onto cardstock or fabric). And I also sometimes use machine wrapped cording to finish the edges.

PS I’ve been asked a number of time how I join my machine wrapped cording when I use it for edging or couching. You can find instructions here.

Fabric Postcards

And once everything is fused together and the edging added, here’s my postcard.

Front …

Fabric Postcards

and back …

Fabric Postcards

Fabulous!

… Continue reading

Things To Do With *Injured* Prints

Before I upgraded to my new wide format Epson printer, I was using an old HP wide format to print my large images. It did a fair enough job but it was rather finicky about what what I fed through it and this resulted in a number of very large prints with some sort of misprint.

You can see on this photo that there is a stripe running through the print. This happened when the paper carrier got caught and wouldn’t feed although the printer kept printing. So it printed over the same section a few times before I managed to free it. As you can also see, it was only a few inches from the end of the print which was about 11″ x 15″ in size so it was a little annoying when it happened.

Image Transfer Wallet

I didn’t throw the print out knowing that one day I would find a use for it. And that day finally arrived when earlier this week I decided I needed a new wallet and this print was the perfect size once I trimmed away the misprinted piece. The finished size of the wallet is about 7.1/2″ x 4.1/2″ folded …

Image Transfer Wallet

… and about 11.1/2″ open. I used digital grounds to print the image so the color is very vibrant, and then I sealed it with a paint-on sealer so now the fabric is protected from dirt and grime and needs only a wipe to clean it, and it can also withstand the rough use that a wallet usually gets.

Image Transfer Wallet

The great thing about designing your own purses and wallets, is that you can make them to your own specifications and include extra pockets and holders as needed, so I added an open pocket for notes and a zipped pocket for change.

Image Transfer Wallet

I made the center section flip, so on the other side I have a pocket with a tab so I can store other bits and pieces securely, and also another open pocket for receipts and my check book.

Image Transfer Wallet

I edged it with some machine wrapped cording and a zig-zag stitch, and added a small unobtrusive snap for closure. I like the way the wallet turned out and I like it even more because I finally found a use for the print. Now, I just need to find uses for the other dozens of *injured* prints that I have lying around!

Image Transfer Wallet

… Continue reading