 As you know I use Photoshop Elements a lot these days and over the years I’ve also collected an enormous amount of Photoshop Brushes which I use particularly to create texture and shadows when making digital art.
Recently however the need for law and order in my brushes folder finally overcame the fear of opening the folder to tidy it up. Let’s just say there are hundreds of brushes in there, most of which I don’t use, and if you’ve ever had the need to sort and order your photoshop brushes, then you’ll know just how difficult that can be.
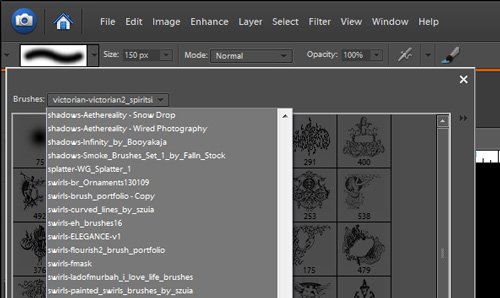
Firstly, if you’ve never used a photoshop brush before, you’ll find them located in a drop down box in the top left of the program. You need to first click the brush tool or the eraser tool in the tools pallete in order for the brushes to become visible.
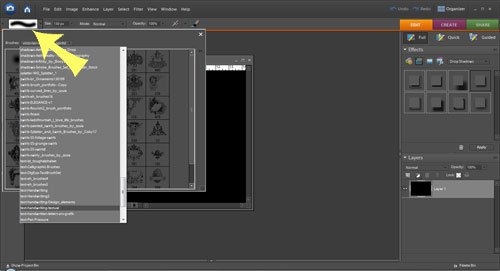
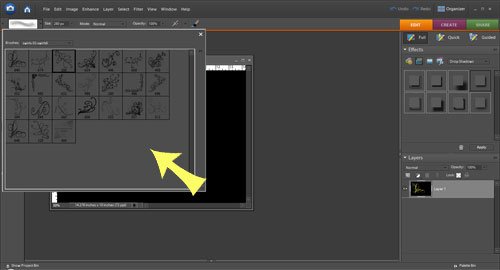
Once you select a brush set, a dialog box opens up to display the brushes included in the set.
And depending on what type of brushes you have available, you can then use them in all sorts of different ways. They are one of the funnest things in Photoshop.

So I finally decided I needed to organize my brushes in such a way that I could easily know what was included in each brush set. This turned out to be easier than I thought.
The first thing I needed was a way to easily view the images included in each brush set and I found a great free ABR viewer .abr is the file type of Photoshop Brushes. (Update: Looks like this free download is no longer available.) This little program is very easy to use and on the download page you’ll also find a video on how to install and use the viewer which is recommended that you view so you know exactly how it works.
So I set up the ABR viewer on one side of my desktop and I opened the folder that contains all my brushes on the other side of my desktop and I began. If you don’t know where your brushes live, you can find them here
c:Program FilesAdobePhotoshop Elements 6.0PresetsBrushes
Viewing the brush files using the ABR viewer I could easily see what sort of images were contained in each file and then I simply changed the filename of each brush by adding a descriptive name as a prefix to each of the files. For example I added “floral” to the beginning of all the brush files that contained flowers and “swirly-flowers.abr” became “floral-swirly-flowers.abr”, and “texture” to the beginning of all the textural brush files, and so on; you get the picture. It took quite a while to sort through and rename the files, but it was time well spent. Now when I go to select a brush file in Photoshop Elements, I don’t have to scroll through each of the files to find brushes that include flowers, instead I can select the brushes that begin with “floral”. This is a big time-saver.
So for those of you who have trouble finding your favorite brushes, I hope this helps. And if you have yet to start collecting brushes, then this is a good practice to set up because collecting photoshop brushes becomes addictive very quickly.
Happy Photoshopping!


