How I Design Bags and Purses: Part 1 | Part 2 | Part 3 | Part 4 | Part 5
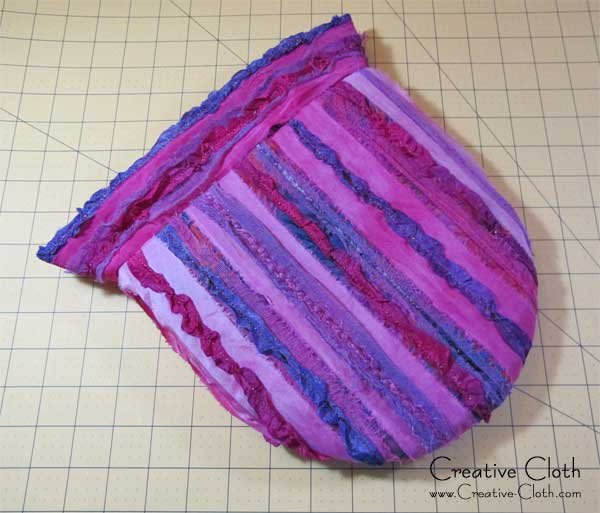
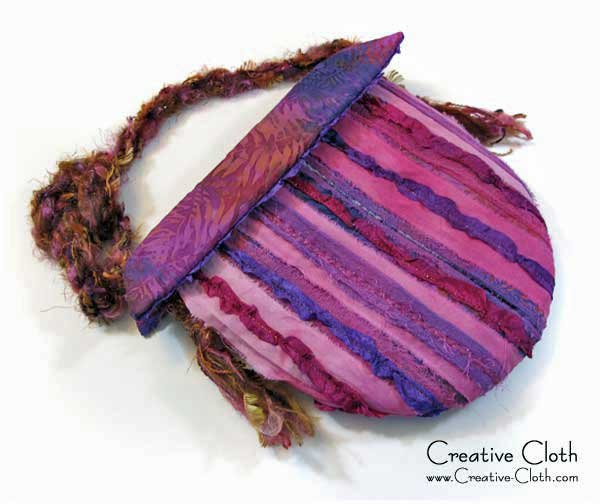
When I finished sewing the bag together and let it sit for a few days, I realized I didn’t like the box shape. It was a little too … well boxy.

So I unpicked it and reshaped the bottom edge into a curve which is much more interesting I think.
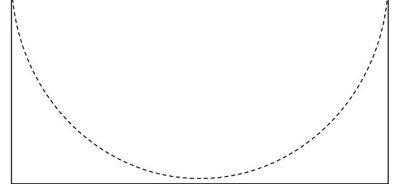
To go from a square or rectangular shape to a curved shape is quite easy. Simply redraft the bottom of the pattern adding a nice even curve that meets the side edges. This is easier to draft using a drawing program.
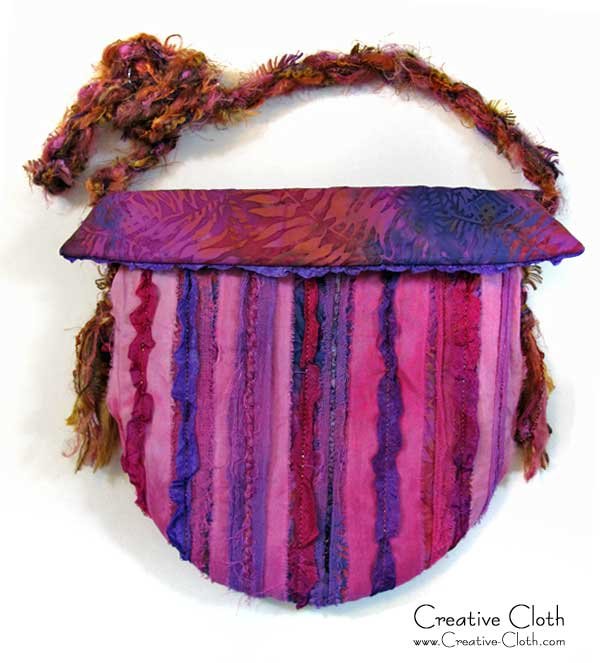
Then while I was considering how to attach the handles, I folded the top edge over to inspect the inside, and all at once the final design fell into place. I love the folded top edge and and the way the fabric contrasts with the textured bag body.
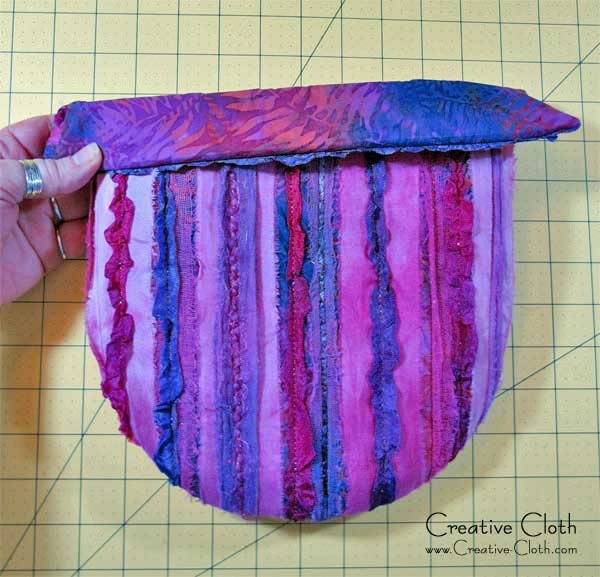
I decided to attach a twisted shoulder strap using lengths of fibers and yarn in colors that matched. See below for a quick tutorial on how to make a twisted should strap using fibers and yarns.

So this bag ended up being nothing like the original sketch but I like it so much better. This is a fun purse that I would wear with jeans when I’m off to lunch or a quick trip downtown. Plus it has several features that I really like and which I’ll keep in mind when designing a bag pattern such as the rounded bottom and the fold-over top edge.
How to make a twisted fiber bag strap – a quick tutorial
Gather together a bunch of decorative fibers, yarns and threads in different textures, colors and thicknesses. This bunch has approximately 20 strands about 3 yards long. Gather all the strands together at one end and tie a knot.

Split the bunch in two with the knot in the middle.
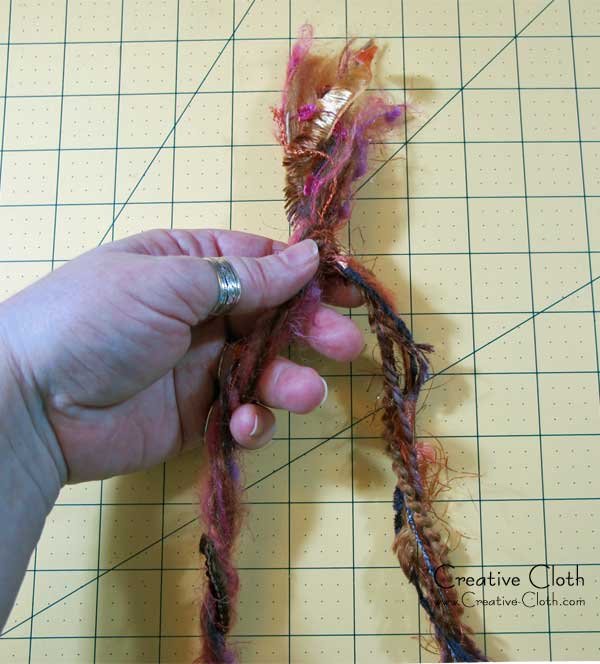
Tie one end of the bunch to something – I tied it to the pole of my floor lamp – then twist the strands until they begin to twist up on themselves.
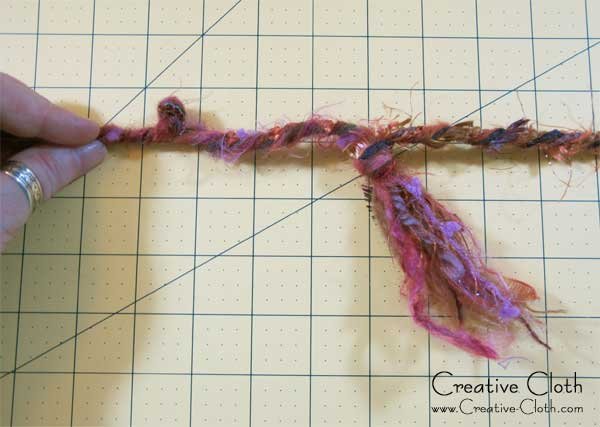
When they begin to twist up on themselves, hold the knotted end which is in the middle, and allow the strands to twist together into one thick strand.
Then tie the other end in a knot.
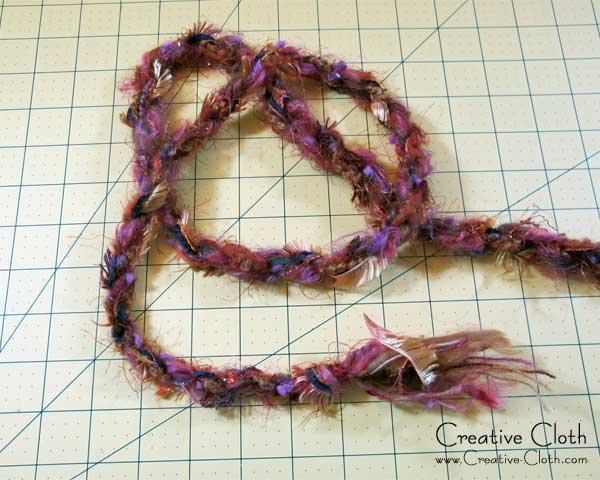
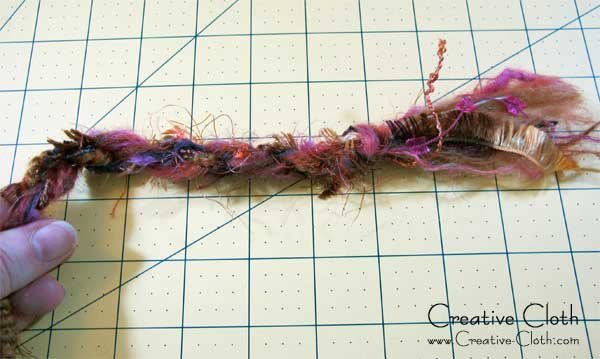
Trim the ends, hand-stitch to your bag and you’re done!